
Adobe Asset Link is a feature to directly access assets stored in AEM from within your Creative Cloud (CC) applications, such as Photoshop, InDesign, Illustrator or XD.
It consists of an extension that needs to be deployed to the CC app(s) and an endpoint on the AEM side. This article will outline the setup process and point out some pitfalls.
Deploying the Asset Link Plugin
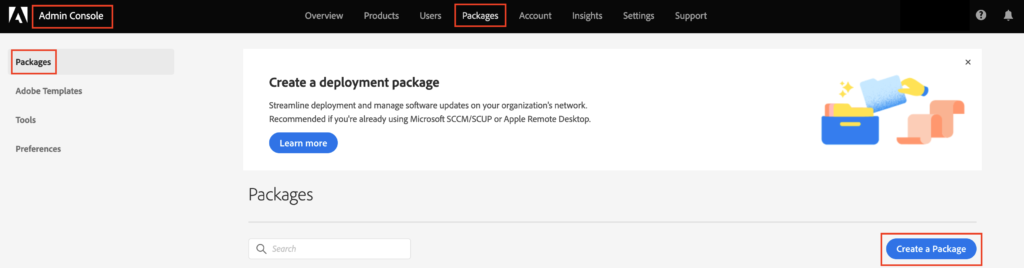
I’m currently not aware of a way to deploy the Asset Link extension to an already existing CC installation. Instead, it needs to be included in a dedicated installation package for CC apps that can be created and retrieved through the Adobe Admin Console. To do this, your Adobe ID will need the according permissions in the Admin Console. Once you are logged in, select “Packages” from the main navigation and got to “Packages” where you will find a “Create a Package” button:
Go through the process to create a package by selecting the options that fit your requirements.
For this example, we are going to use:
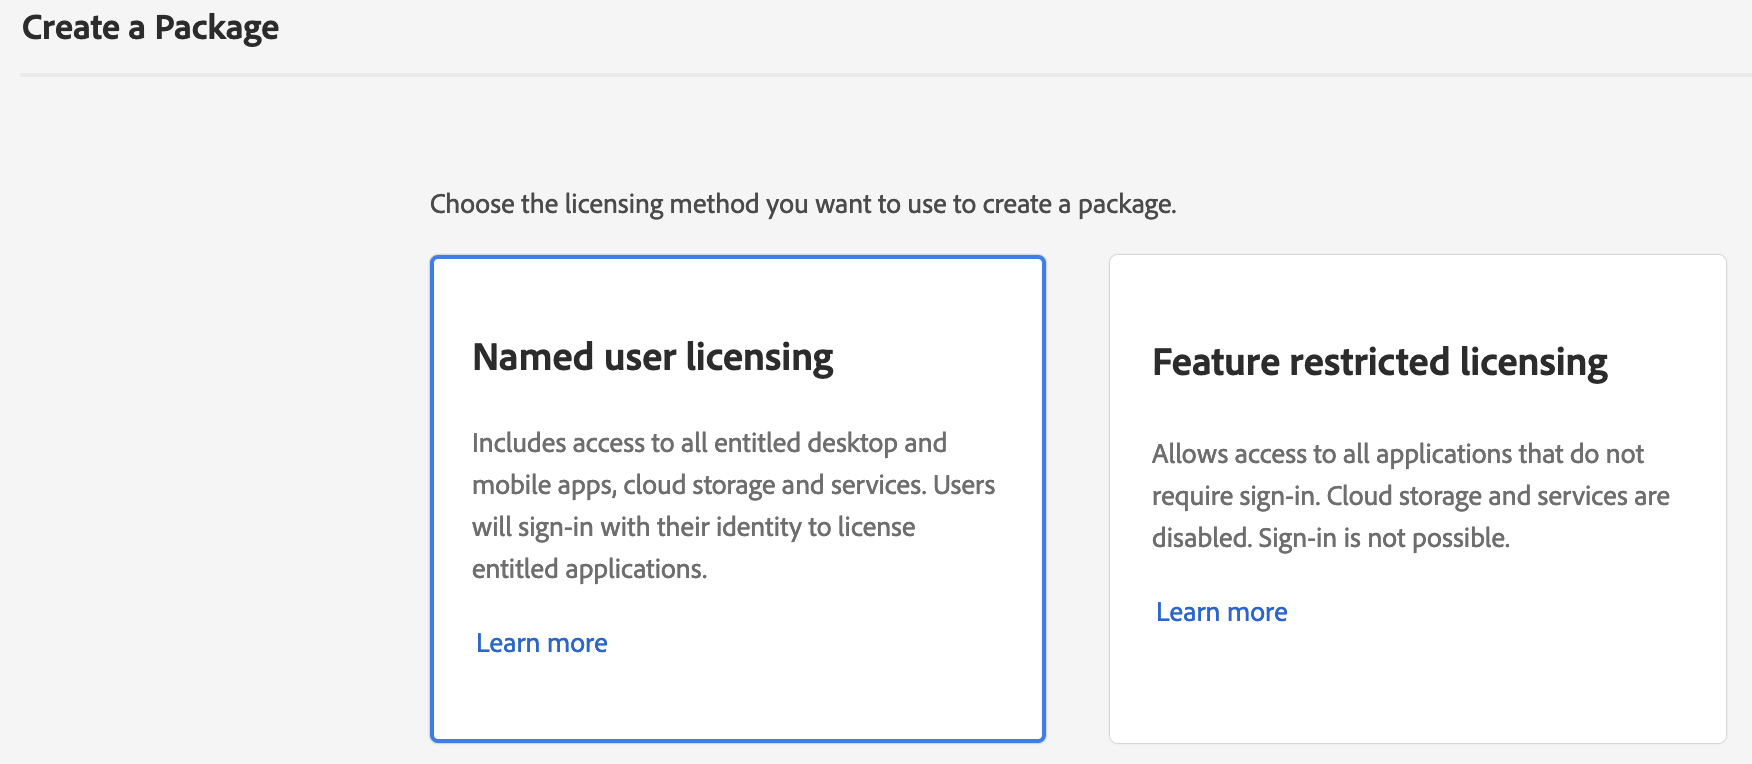
- Select a licensing method, e. g. “Named user licensing” to create a Named User Licensing Package.
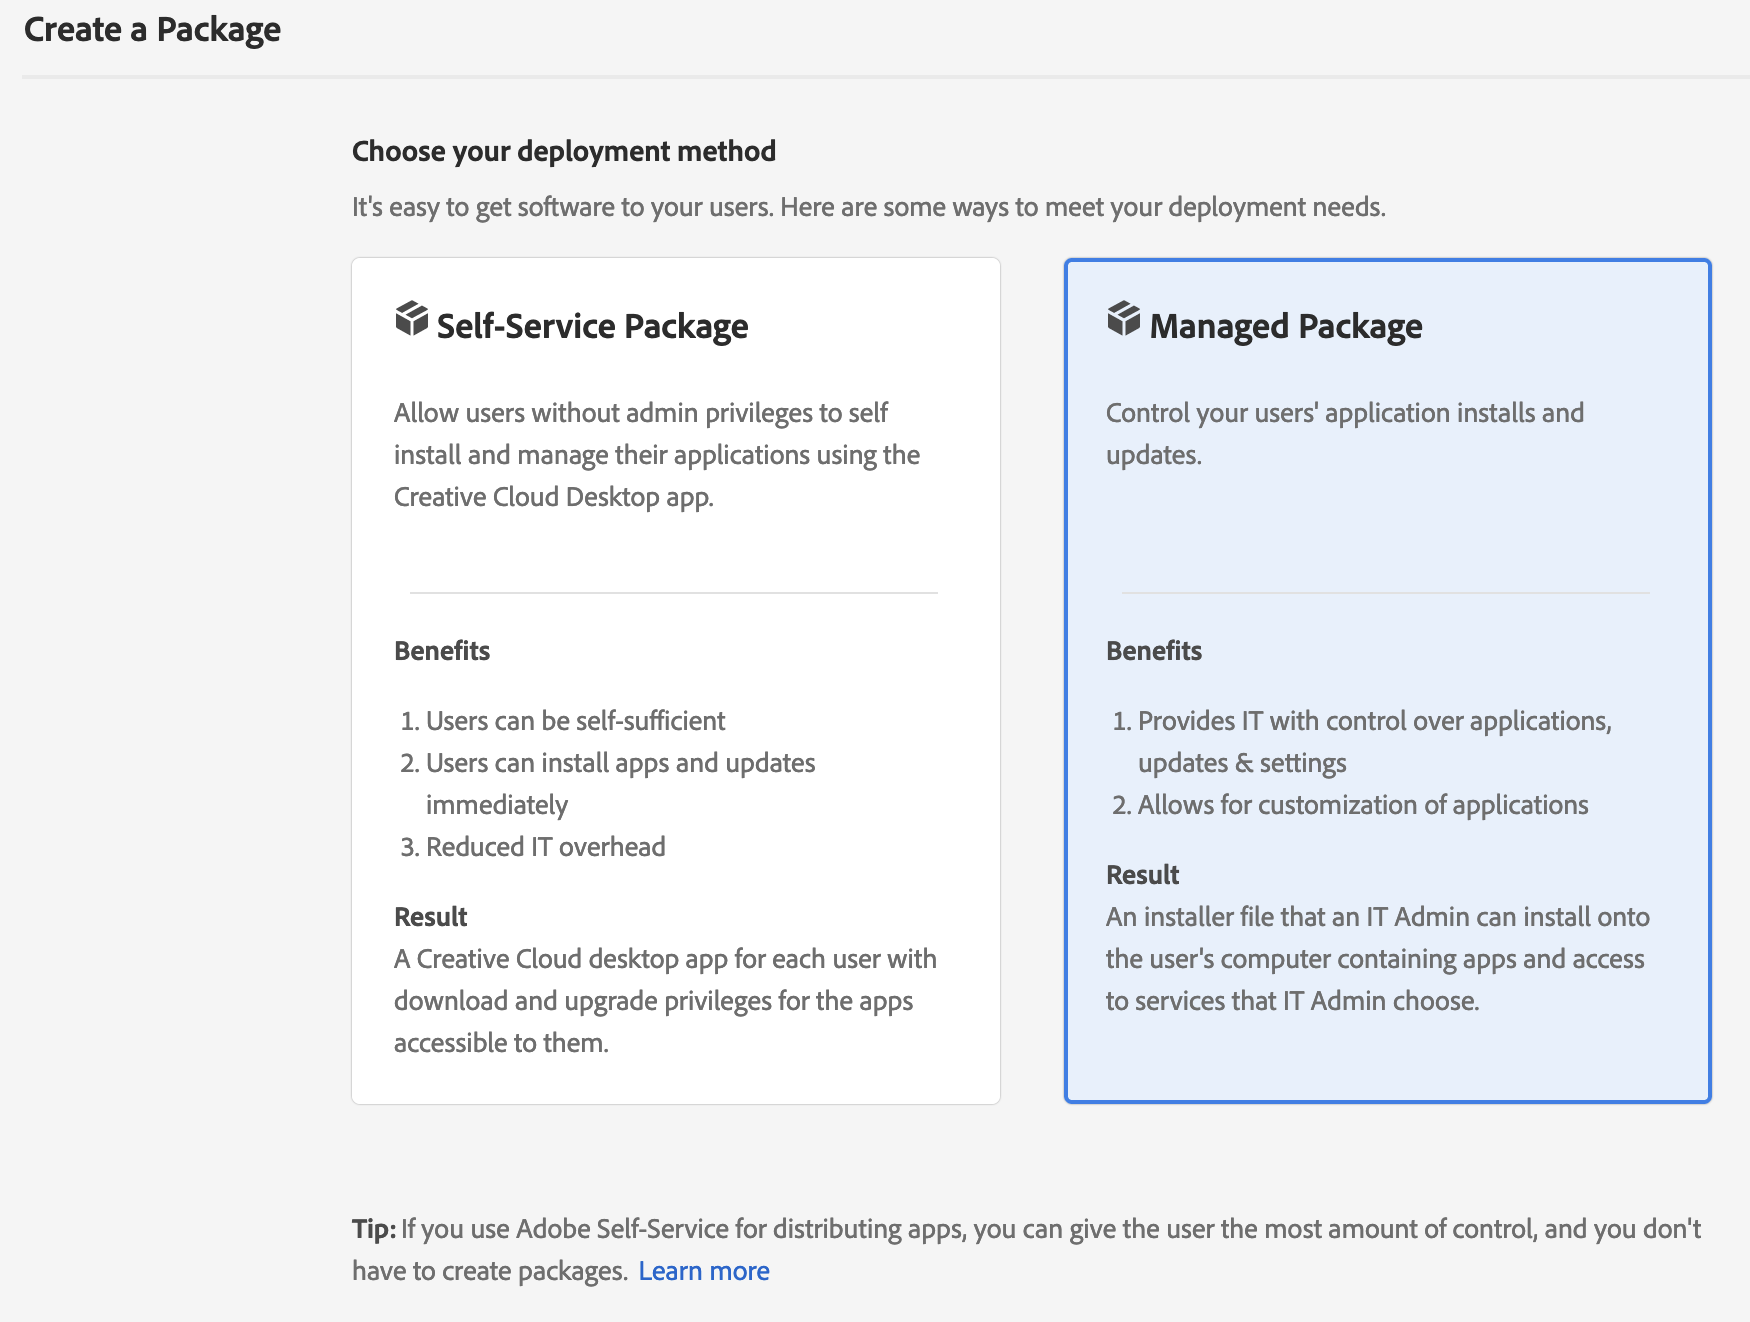
- Select a deployment method, e. g. “Managed Package”.
- Select the target platform (e. g. macOS with Intel CPU) and
select a language (or let the users operating system determine the language).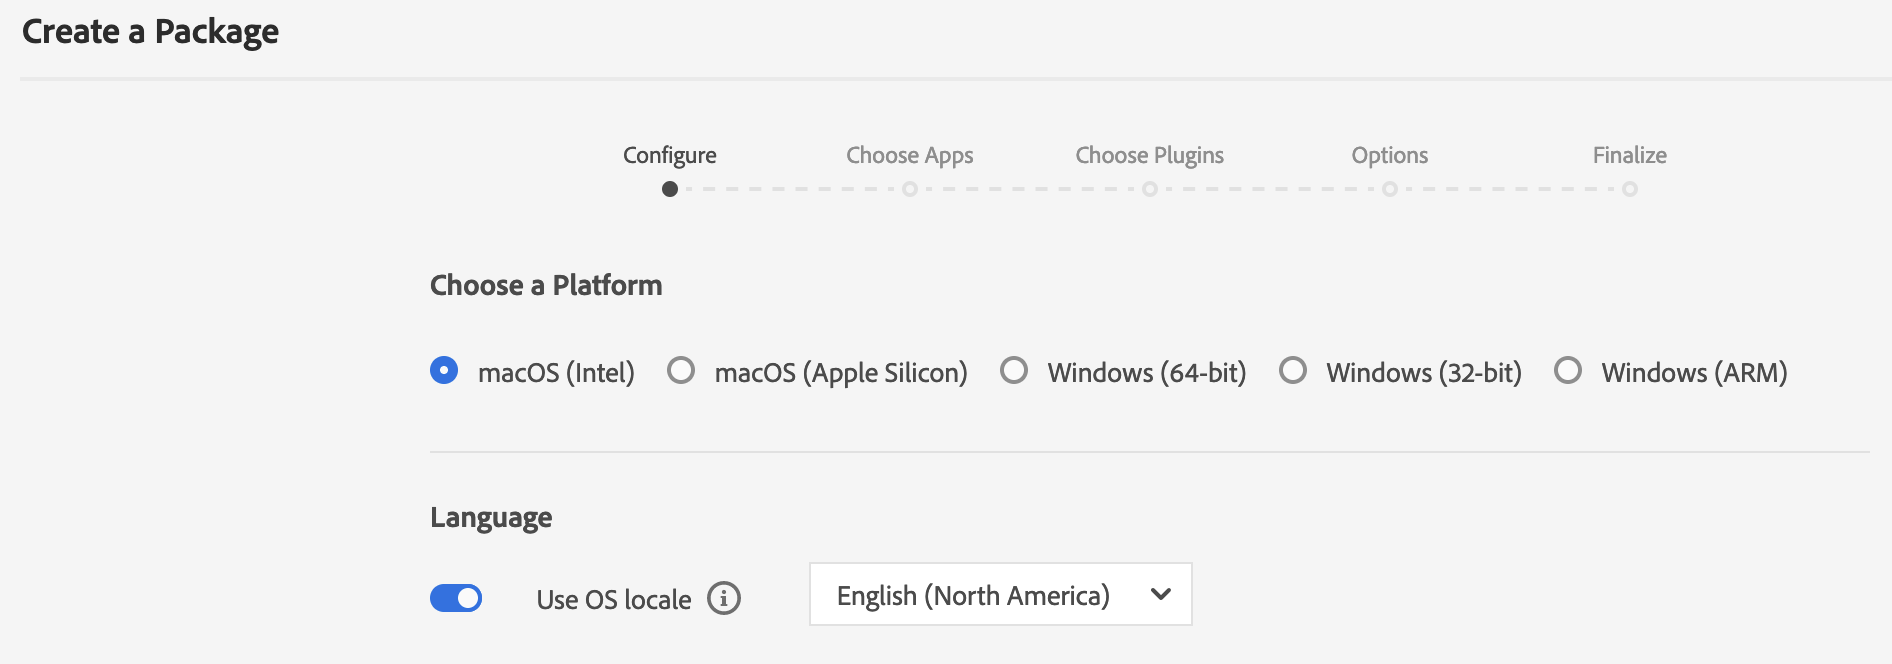
- Select the CC apps that you want to include in the package, e. g. Adobe Photoshop.
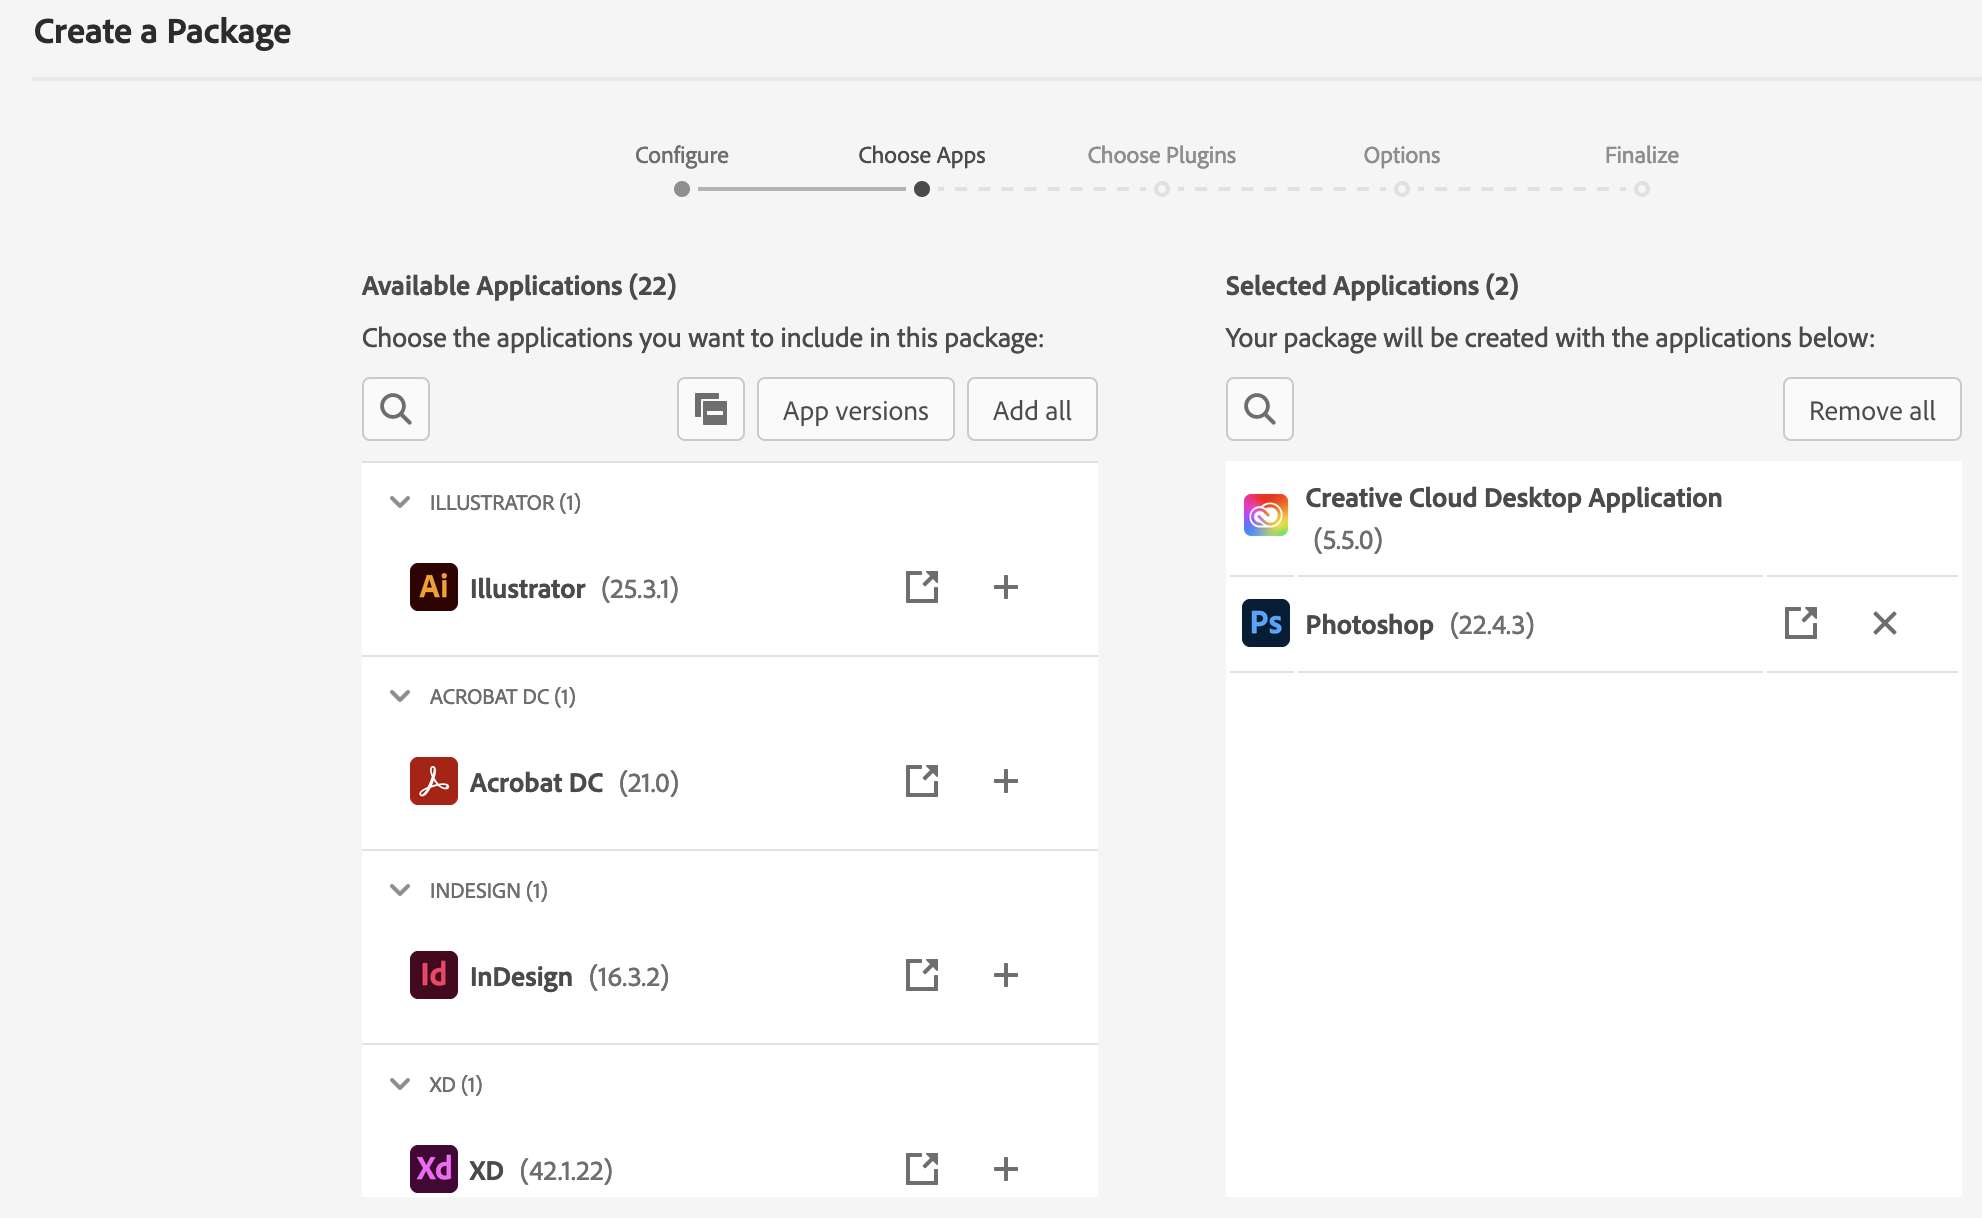
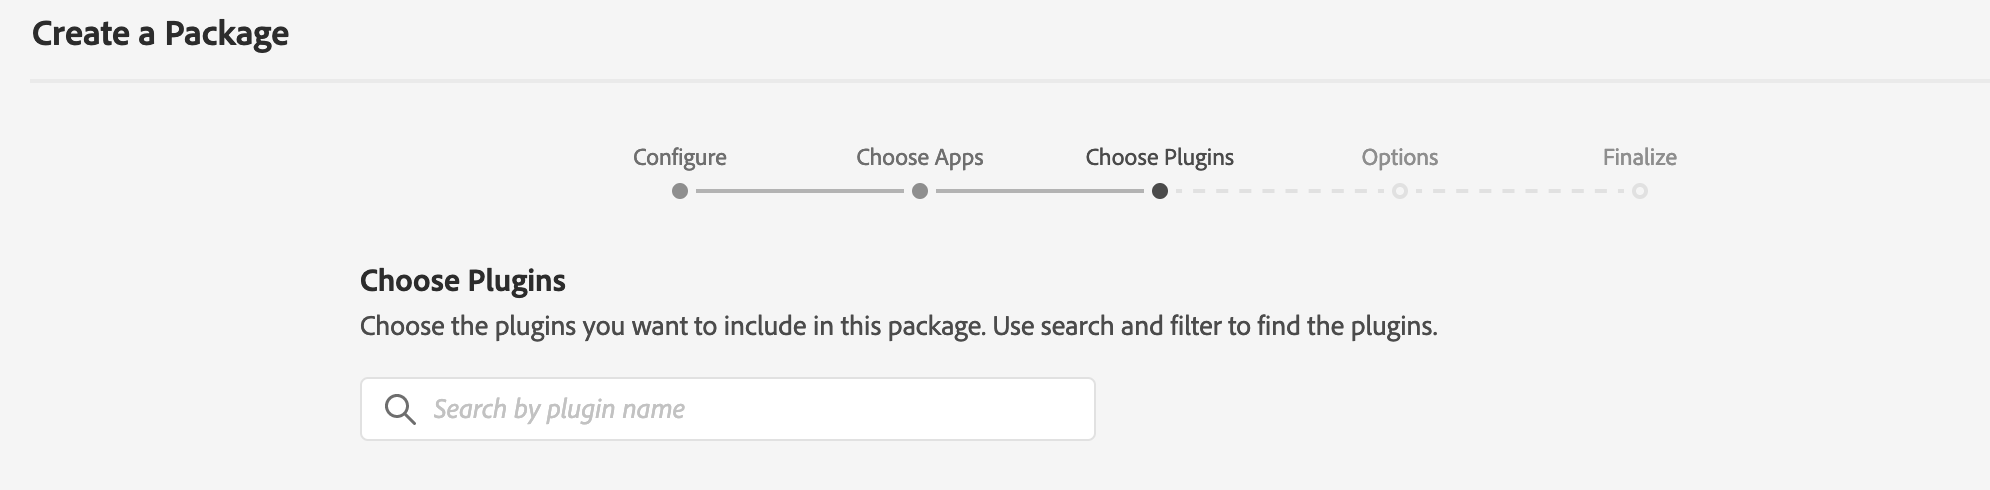
- Optional: Add plugins to your package, if you want to include them. For this example, we are going to skip this step by clicking “Next”.
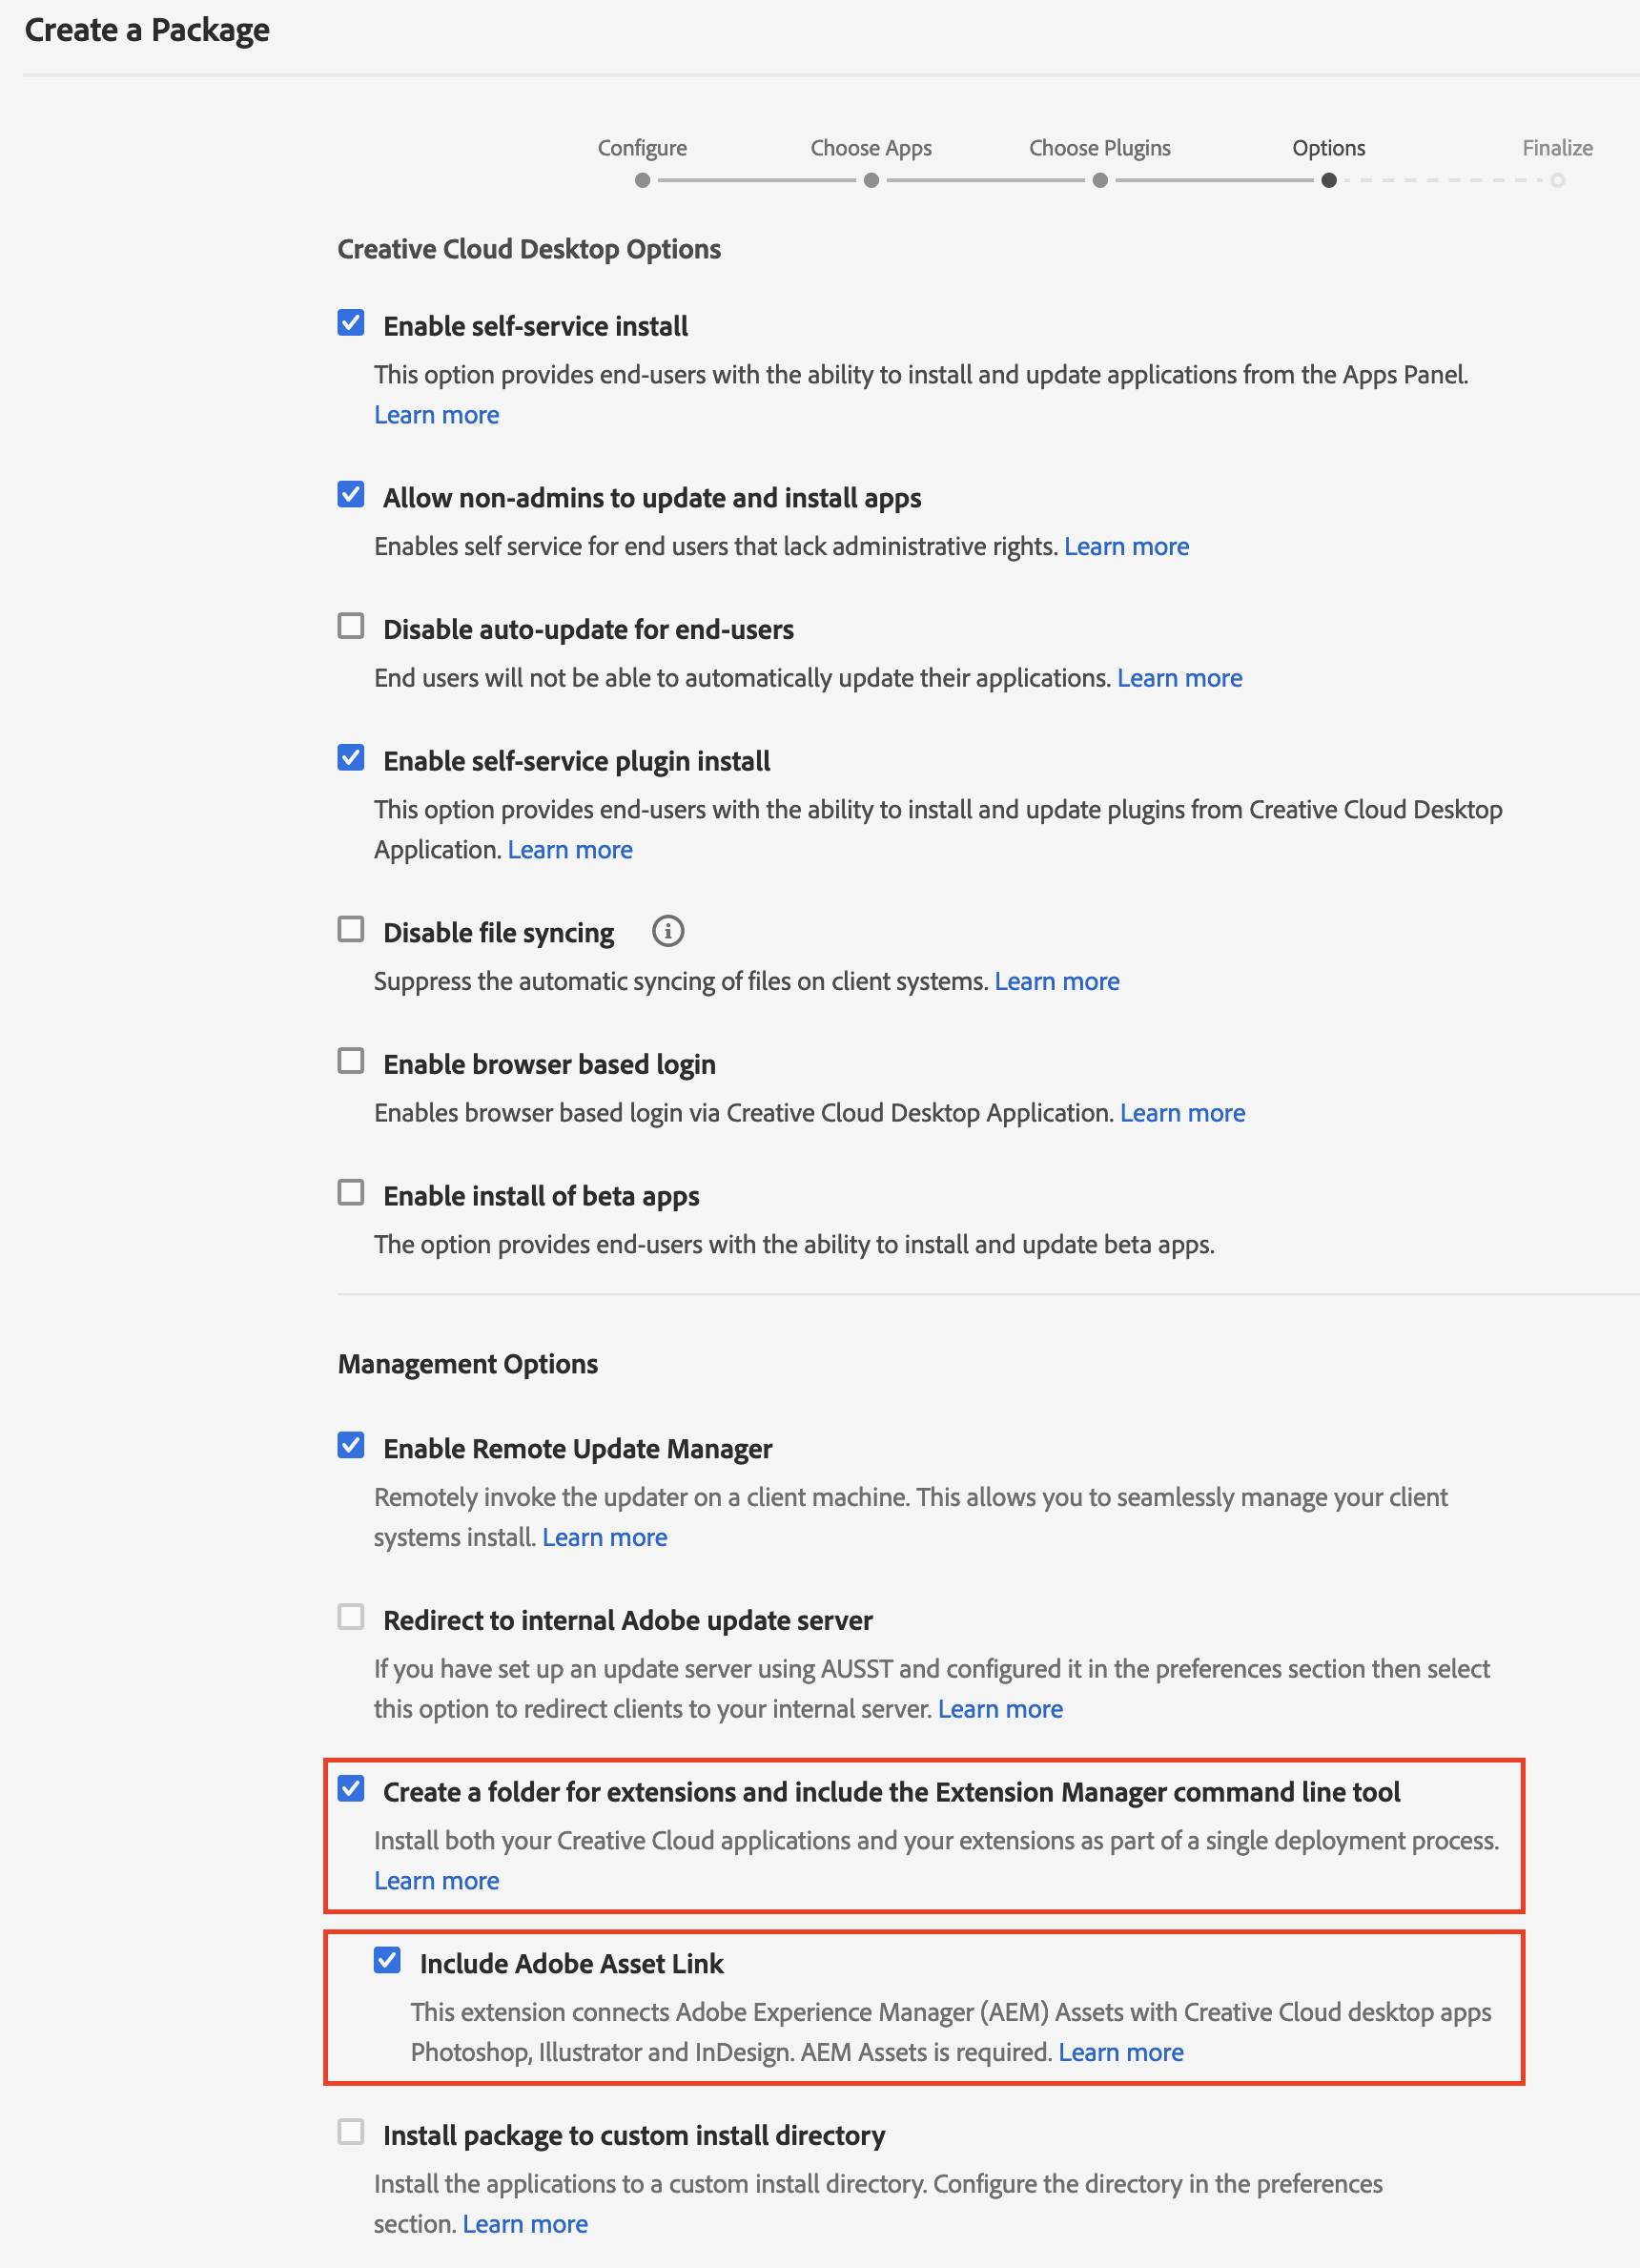
- Configure your package as required.
To include the Asset Link extension, please select the following options:- “Create a folder for extensions & include the Extension Manager command line tool”
- “Include Adobe Asset Link”
- Provide a package name and finalize the package creation by clicking the “Build Package” button.
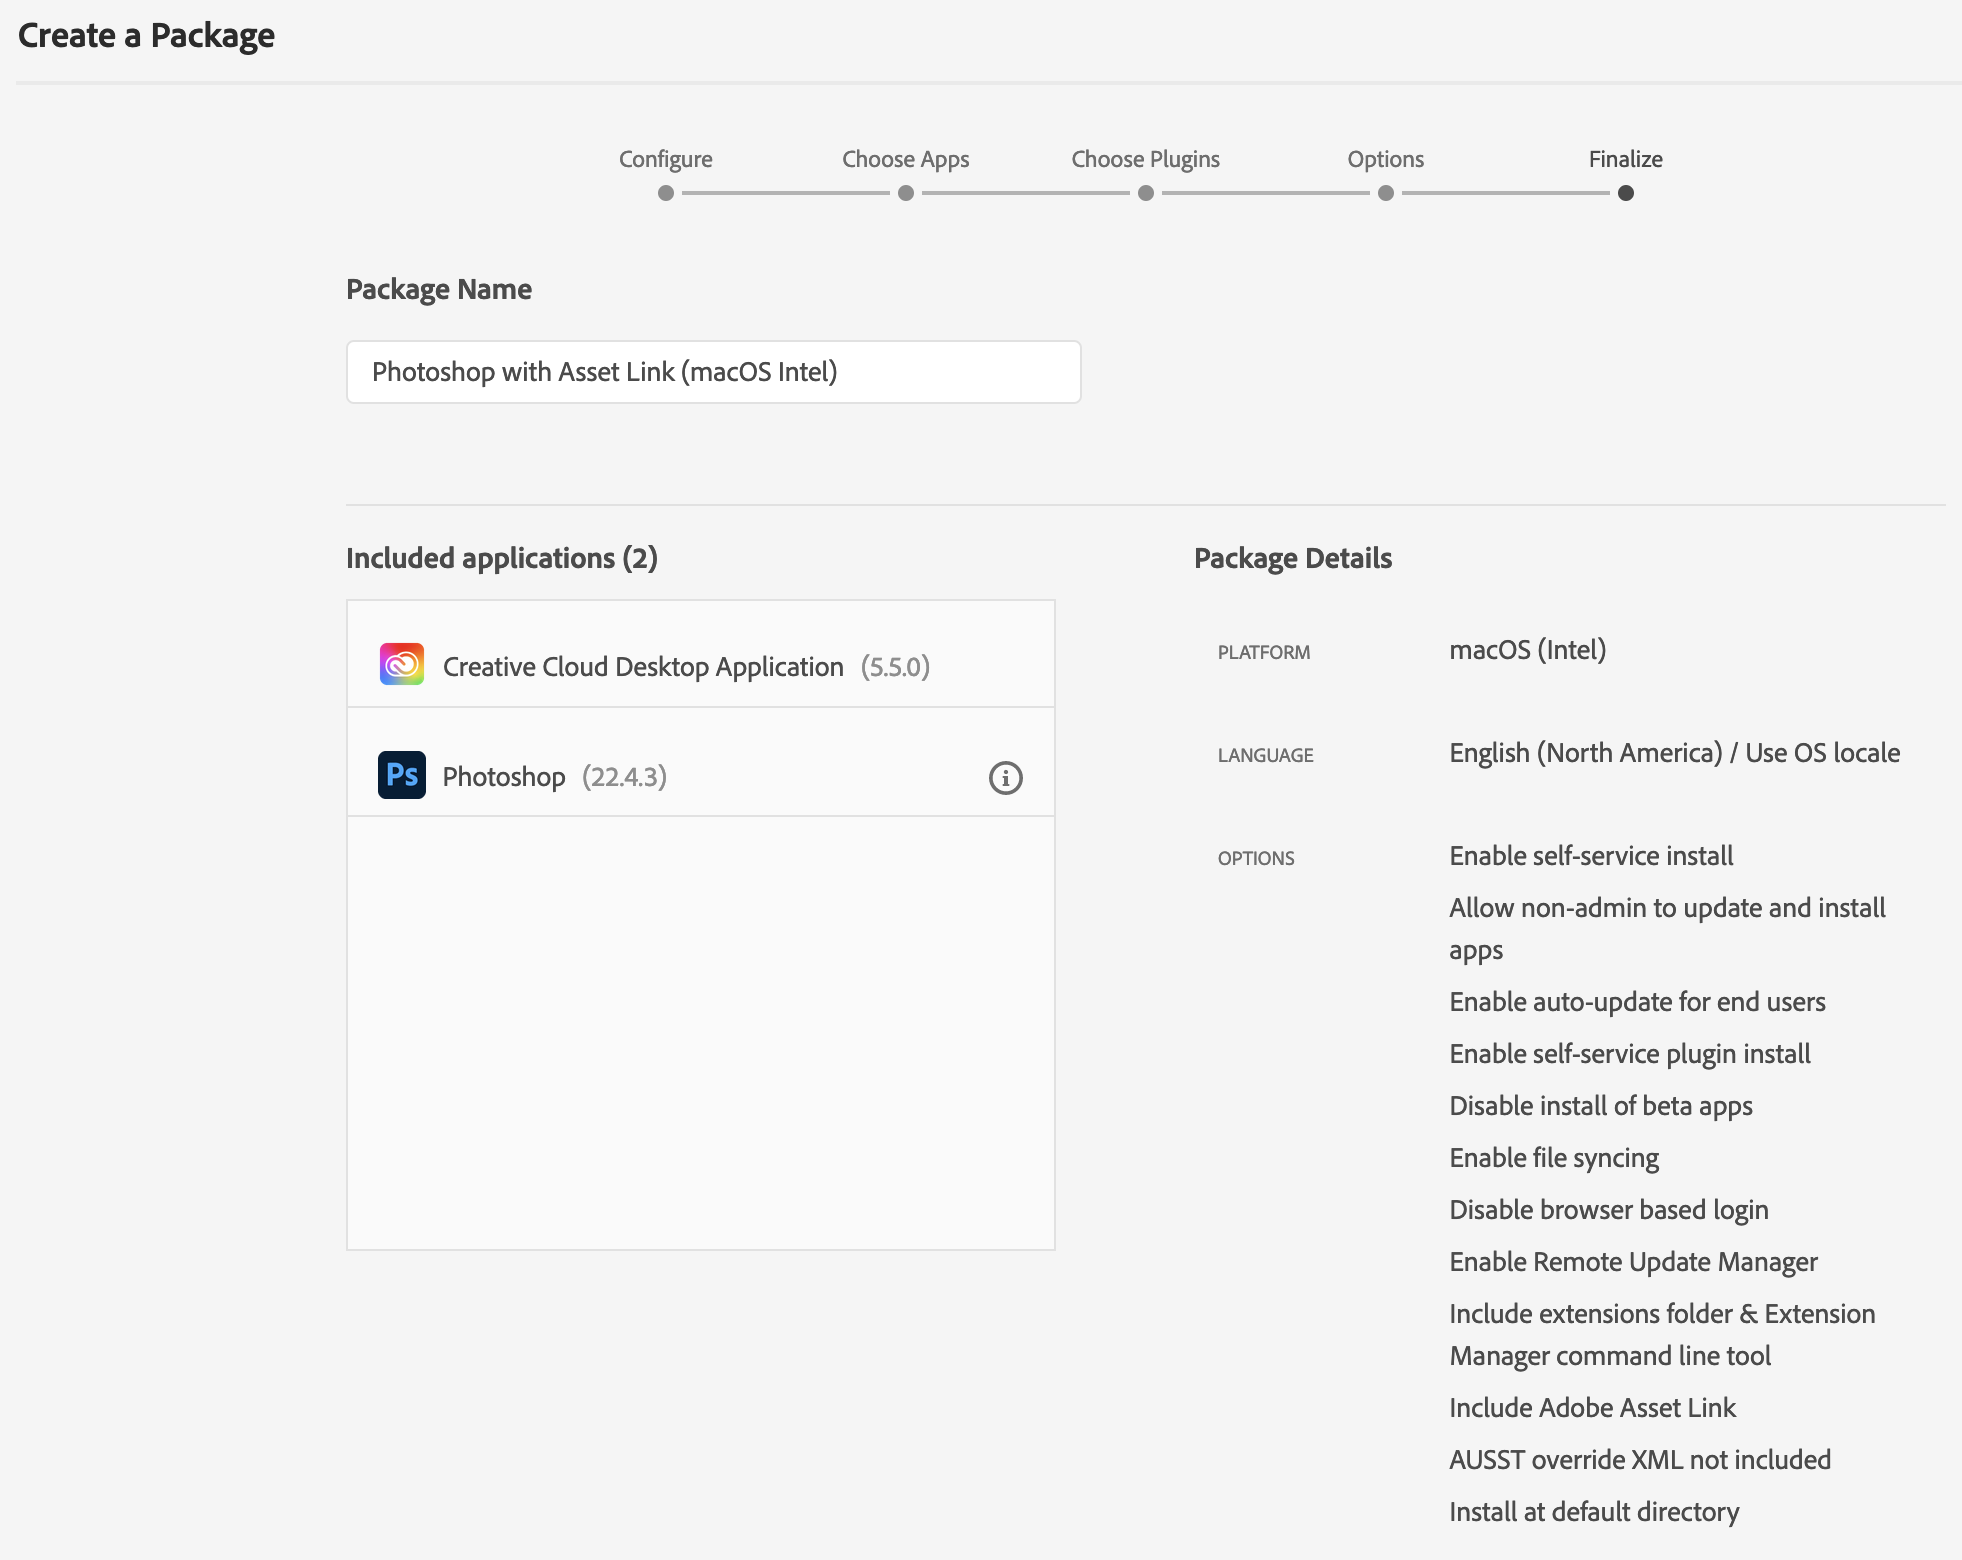
- Now you will see the package in your package list and can download and install it (or provide it to your responsible IT department to have it deployed centrally to managed computers).
Additional details can be found in the documentation on how to install Adobe Asset Link.
Preparing your AEM instance
On the AEM side there are two things to consider:
- Validate your AEM version or install the required feature pack.
- Configure AEM to use Adobe IMS authentication
AEM version and feature pack
For AEM 6.4 and 6.5 installations that are up-to-date with the latest service packs (SP), Asset Link support works out-of-the-box and no additional feature pack is required (specifically for AEM 6.5.2 or later respectively 6.4.4 or later). If you don’t yet have the latest service packs installed, please consider to do so as this is a general recommendation, independent from Asset Link support to benefit from the latest stability, performance and security improvements.
If there are any objections and you need to stay on an older patch level, Asset Link will also work on AEM 6.4.0 to 6.4.3 if you install the according feature pack from the Software Distribution portal.
Configure Adobe IMS authentication
If you are already using Adobe IMS authentication for user login on your AEM instance, you will need to perform the configuration steps manually as outlined in this documentation by setting certain OSGI configurations.
If you don’t use Adobe IMS authentication, you can simply install the configuration package as described here and only need to add two OSGI configurations.
Once IMS authentication is configured successfully, your AEM login screen will look a bit different and provide an option to “Sign in with Adobe” using the Adobe IMS authentication (meaning: your Adobe ID).
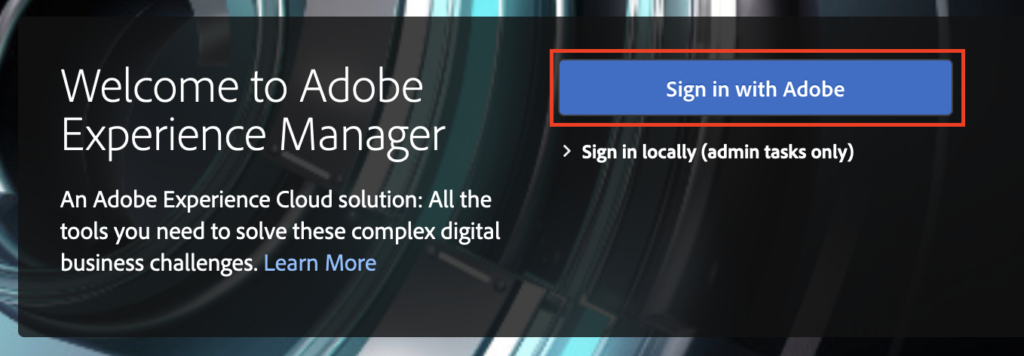
You will still be able to sign in with local user accounts by selecting the “Sign in locally” option.
Configuring the connection
Once the CC application(s) is/are installed with the Asset Link extension, you can configure the URL of your AEM authoring instance, either manually in the extension or by deploying an assetlink-settings.json file containing your connection details to the respective folders on your computer.
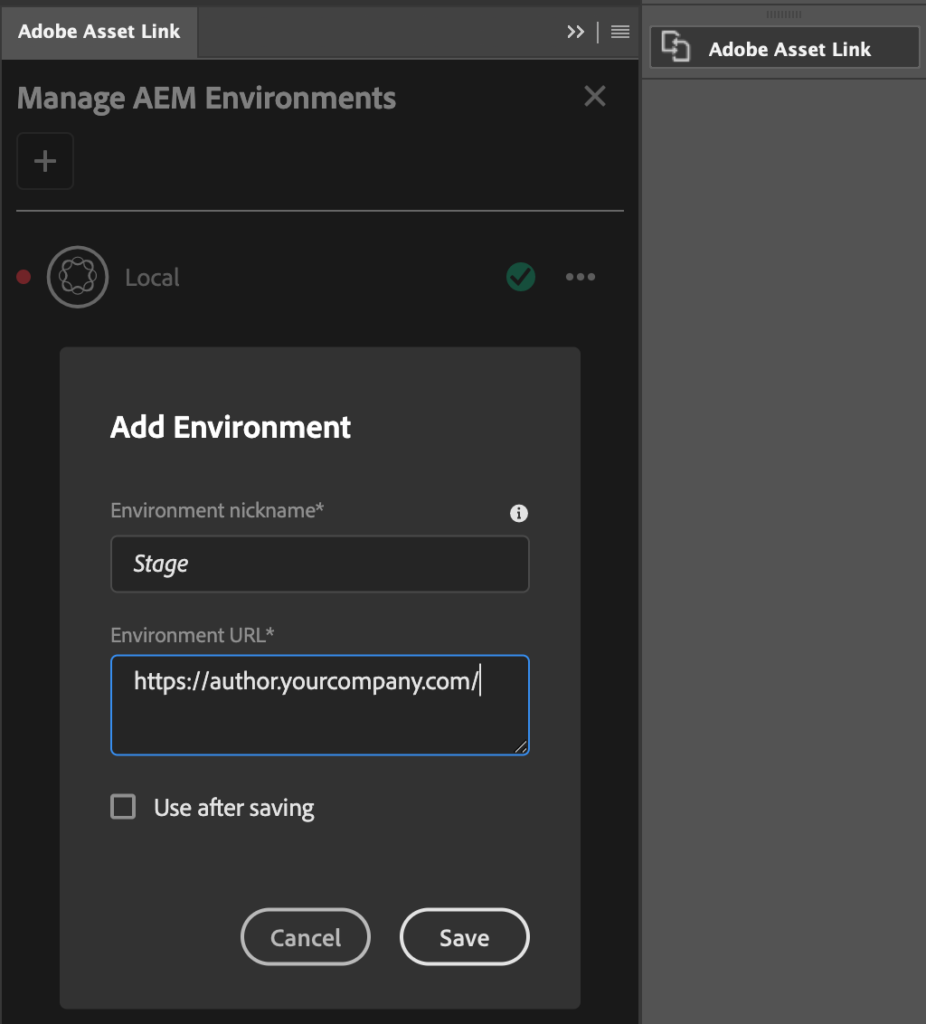
JSON file: {"aemServer":"author.yourcompany.com","aemPort":"443","aemScheme":"https"}
Testing the connection
At this point, you should test the connection. Please be aware that your IMS user (the Adobe ID that you are using for the Creative Cloud subscription) does not yet have any access permissions on AEM side. So you will receive an error message. However, the connection attempt will sync your IMS user to the AEM instance along with all the groups that it has been assigned in the Admin Console.
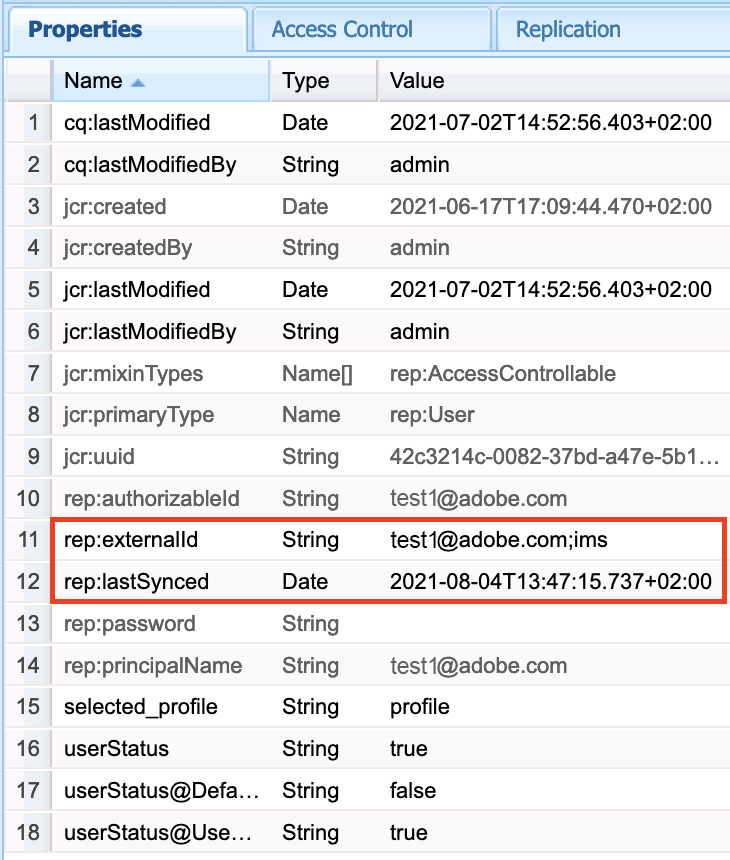
Please note the “rep:externalId” property that holds the user id followed by an identifier of the external system where the user originates (here: “ims”) after a semicolon. This mechanism also applies for other Identify Provider (IDP) integrations that sync users to AEM, such as LDAP or ActiveDirectory connections (with a different id, though). You will also find according groups from Adobe IMS synced to AEM having the same property with the appended id for IMS.
Please note: If you already have a user with the same id (rep:principalName) in your AEM repository, the default behavior is to create a new user (with a different id; numbers will be appended) when syncing from Adobe IMS as outlined in the rules list of the Group Mapping documentation.
Group mapping
As outlined above, this new user will be member of the synced IMS groups from the Admin Console but will not be member of any AEM groups, thus not have any permissions to access AEM. Therefore, the synced groups need to be mapped to corresponding AEM groups that hold actual permissions on the AEM side.
So if you have a group called “Asset Link Users” in the Adobe Admin Console and assigned that group to all users (Adobe IDs) that should be able to use Asset Link, then you will find this group synced to your AEM repository after the first attempt of a user (member of that group) to access AEM through Asset Link. The group does not yet have any permissions on the AEM side.
The recommended process is to setup an according group on AEM side (I usually recommend to use the Netcentrics ACL tool for permission and group management), e. g. called “aem-asset-link-users” and make the synced group “Asset Link Users” a member of this AEM group. This way, all asset link users will inherit the permissions from this AEM group.
See the Group Mapping documentation for additional details.
Proxy support
There is one important limitation to Asset Link that corporate users should be aware of. As mentioned on the proxy support documentation for Creative Cloud apps and the prerequisites page, Adobe Asset Link does not (yet) support proxy environments (such as Kerberos):

While it’s totally possible to use a non-authenticated proxy, there is currently no support for proxy authentication. The only way to work around this limitation is to create allow-rules for the required endpoints to allow authentication free communication.
There are two aspects that need to be considered here:
- Client-side proxy (Creative Cloud apps)
Communication originating from the client-side, namely the Creative Cloud app and the Asset Link extension, needs to by-pass any authenticated proxy. This includes communication to the connected AEM instance(s) as well as Adobes Creative Cloud network endpoints. - Server-side proxy (AEM)
As mentioned above, Asset Link needs to be able to communicate with AEM. Apart from that, AEM needs to be able to verify provided credentials against an Adobe IMS endpoint(s) at *.adobelogin.com. You can either allow direct communication in your network infrastructure or configure a proxy for AEM. The proxy configuration has to be done at two distinct places:
a.) JVM system properties: -Dhttps.proxyHost=hostname and -Dhttps.proxyPort=port (if required also -Djava.net.useSystemProxies=true and/or -Dhttp.nonProxyHosts)
b.) “Apache HTTP Components Proxy Configuration” OSGI configuration, usually found at/apps/system/config/org.apache.http.proxyconfigurator-pid.config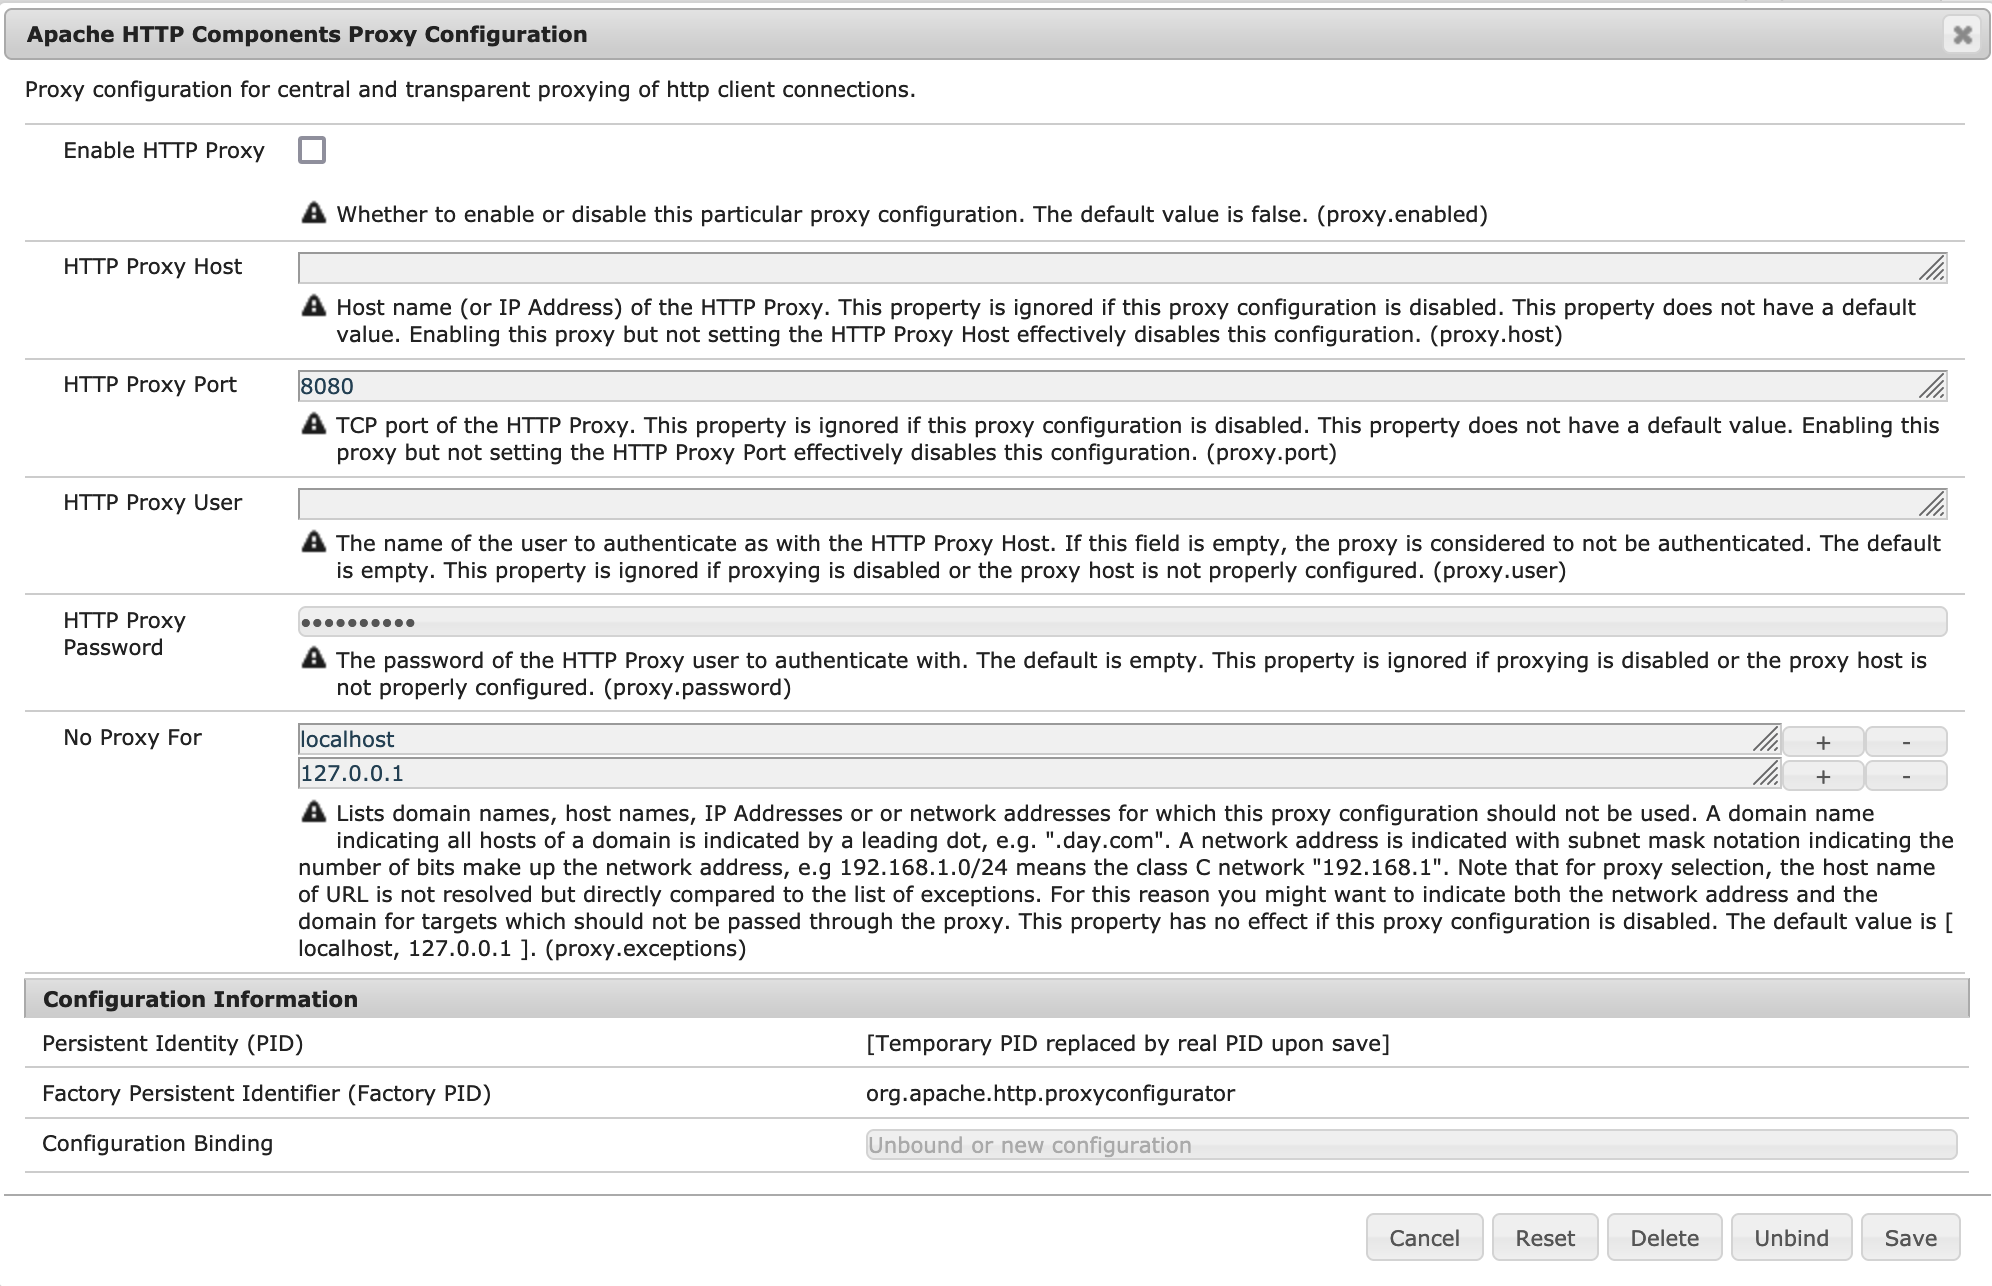
Final remarks
That’s the basic setup and after following these steps you should be able to use Adobe Asset Link with your AEM instance. There are a couple of other steps that can/should be done for certain use cases (e. g. for placement only renditions for Adobe InDesign) that you can find in the documentation.
If you are facing any issues, you may want to check the Asset Link troubleshooting guide and the known issues of Asset Link. For additional questions, please feel free to reach out.
Additional Resources
- Adobe Asset Link – Marketing page with a high level functionality overview
- Adobe Asset Link – User Guide
- Manage assets using Adobe Asset Link
- Deploy Adobe Asset Link
- Adobe Asset Link 3.0 and AEM (incl. video)
- Configure AEM for Adobe Asset Link
- Troubleshoot Adobe Asset Link
- Known issues with Adobe Asset Link
- Proxy support in Creative Cloud products (incl. Adobe Asset Link)
- Creative Cloud Network Endpoints