
Sending e-mails from AEM is pretty easy, right?
For “classic” AEM 6.5 you just need the connection details of your mail server along with account credentials, add these as an OSGI configuration for the Day CQ Mail Service to your instance and you’re ready to go. (Curious why this service might be called “Day CQ”? Please refer to my post on AEM history.)
If you are looking at AEM as a Cloud Service, things look a bit different. The official documentation outlines the setup pretty good. This article is going to guide you through the process step-by-step and provide some explanations.
Step 1: OSGI Configuration
Let’s start with the most simple part: telling AEM how to send e-mails. Similar to AEM 6.5, this is handled through an OSGI configuration for the Day CQ Mail Service. In contrast to classic AEM 6.5, there is no way to directly access the Apache Felix web console for AEM CS nor to add or change an OSGI config at runtime. So you need to add an according config file to your code base and deploy it through Cloud Manager to AEM CS. If you are working with the latest Maven AEM Archetype, you should add the configuration to the ui.config module, e. g. as
ui.config/src/main/content/jcr_root/apps/mysite/osgiconfig/config/com.day.cq.mailer.DefaultMailService.cfg.json
The configuration should look like this:
{
    "smtp.host": "$[env:AEM_PROXY_HOST;default=proxy.tunnel]",
    "smtp.port": "30002",
    "smtp.user": "$[env:EMAIL_USERNAME;default=myEmailId]",
    "smtp.password": "$[secret:EMAIL_PASSWORD]",
    "from.address": "noreply@wknd.site",
    "smtp.ssl": true,
    "smtp.starttls": false,
    "smtp.requiretls": false,
    "debug.email": false,
    "oauth.flow": false
}
If you are familiar with e-mail configurations for AEM 6.5, you will notice a couple of things here:
- SMTP Host is referencing the predefined and reserved environment variable
AEM_PROXY_HOSTinstead of directly pointing to the target SMTP host. - SMTP Port is pointing to a custom port that needs to be forwarded through advanced network configuration of the AEM CS environment, not the actual target port (e. g. 465 or 587). The port can be freely chosen (from non-restricted ranges) but needs to be reflected when setting up port forwarding in step 3.
- SMTP User and Password are referencing custom environment secrets that need to be set through Cloud Manager. This allows to avoid having them in your source code repository and also makes it possible to update them through Cloud Manager without code deployment. See next step on how to set this kind of environment variable. Make sure that the naming of your variables match up between this config and what you setup in Cloud Manager.
Once you have successfully deployed the configuration, you can double check by retrieving the OSGI configuration values from your AEM instances/pods. As mentioned earlier, AEM CS does not expose the Apache Felix web console directly but you can check through the Developer Console.
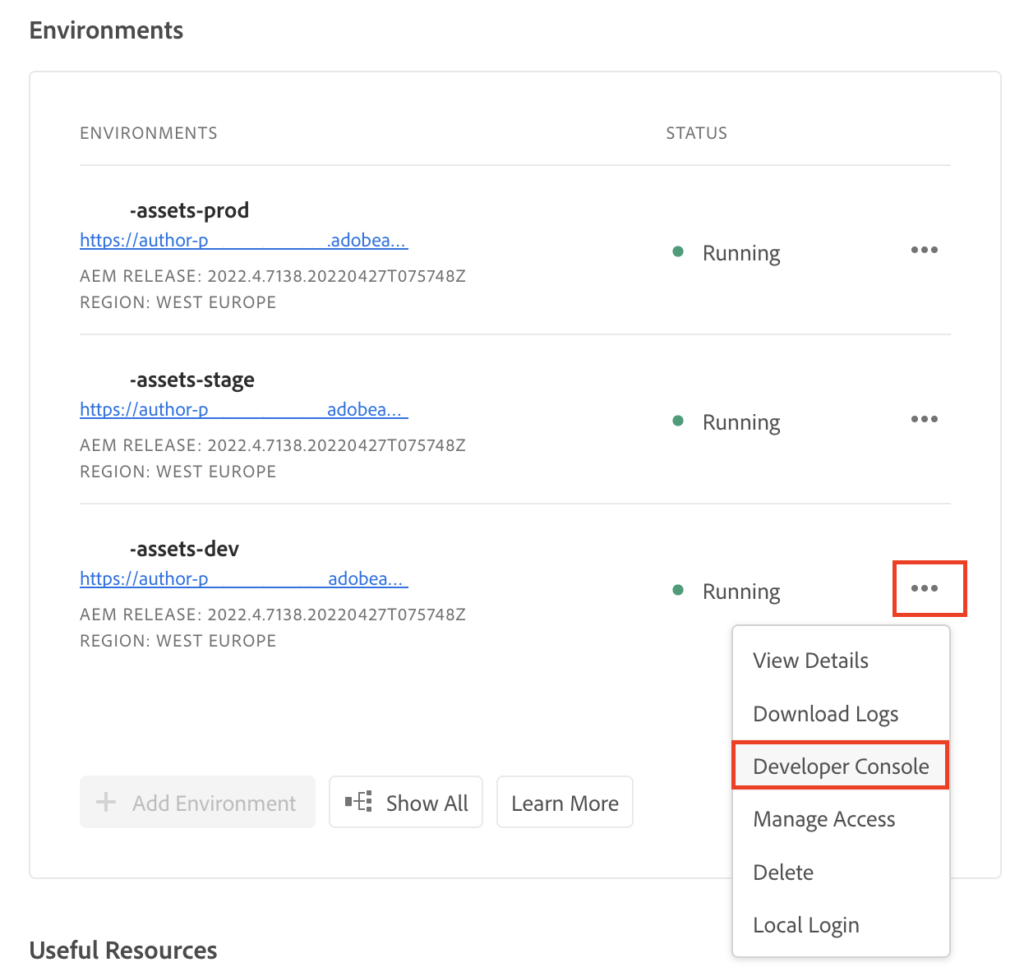
- Go to Cloud Managers Overview page, click the three dots next to the environment you want to check and select “Developer Console.
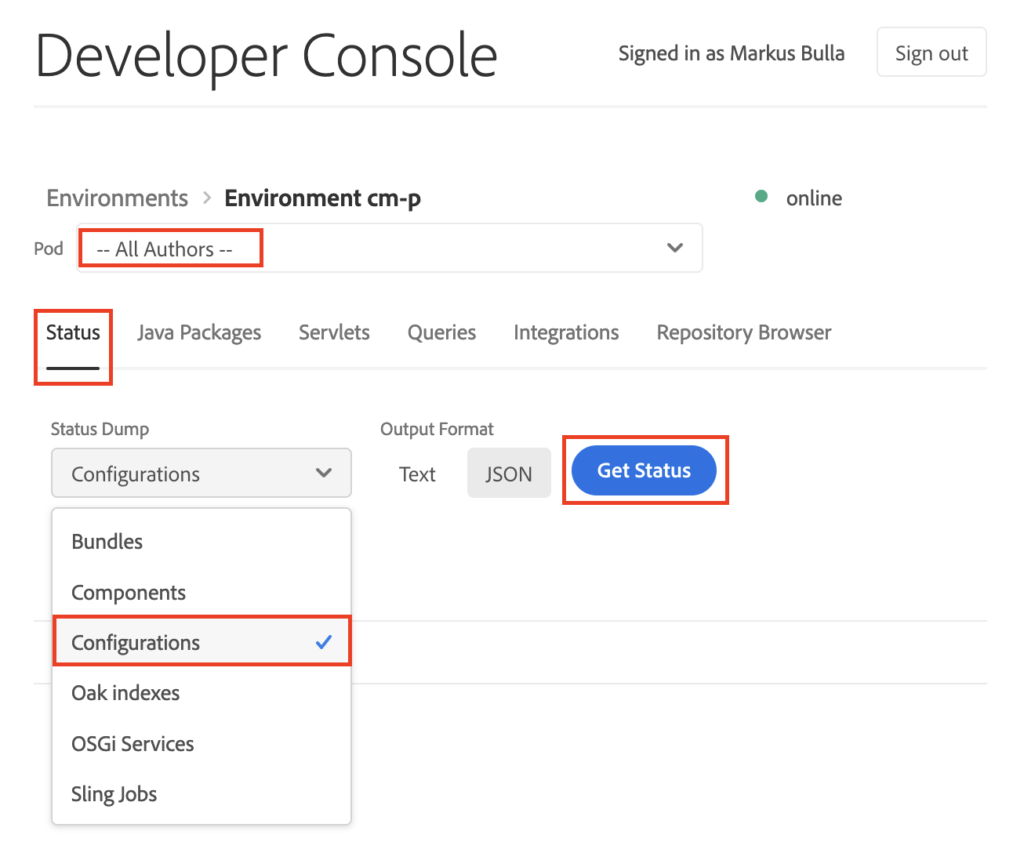
- On the Developer Console, select the pod(s) you want to check (e. g. “All Authors”), select “Configuration” on the “Status” tab, choose your desired output format and click “Get Status”
- You will get a view of all OSGI configurations for your selection. My personal recommendation is to download the output file and open it in the editor of your choice to check it. Please note: The search feature on that result site is line-based, thus searching for e. g. “
com.day.cq.mailer.DefaultMailService” will just give you the lines with the PIDs (along with their line number) but not the actual configuration entries from the lines below the PID entry. That’s why I prefer to check the file offline:
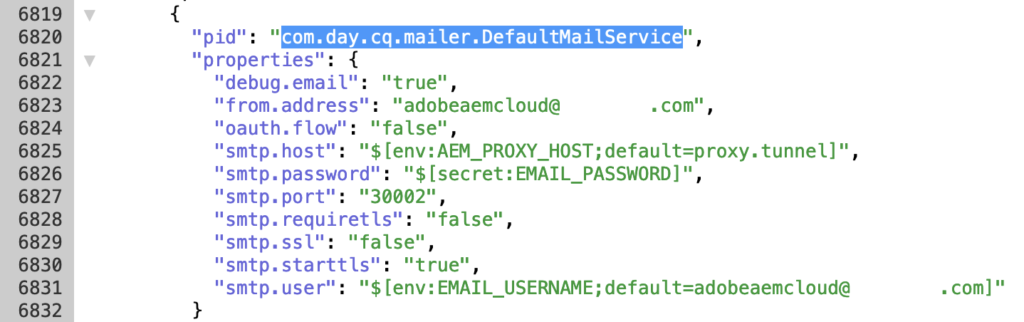
If your configuration looks as desired, you’re ready for the next step.
Step 2: Create environment variables
There are two ways to set an environment variable for AEM CS:
- On the Cloud Manager UI or
- using the Adobe I/O command line interface
Both ways are pretty straight forward and well documented in the official documentation. If you have the aio CLI already setup and configured, you’ll probably go this route. If you haven’t and you don’t see other use cases for the CLI, it may be easier to just use the Cloud Manager UI:
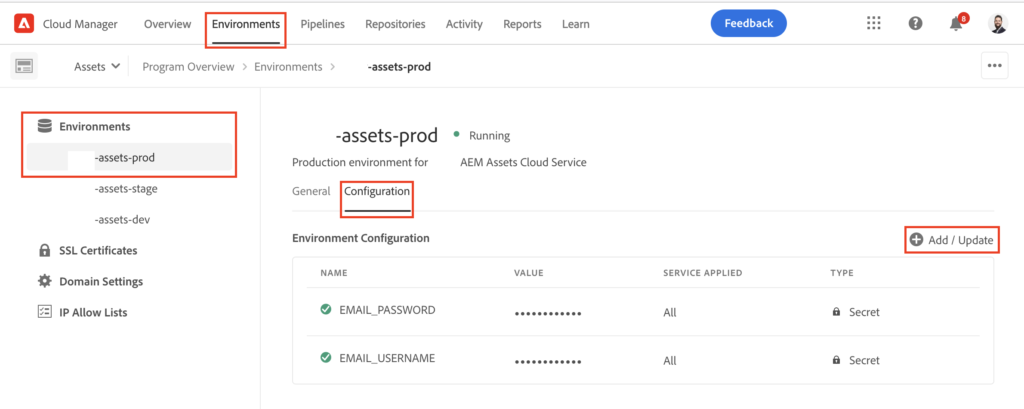
You can see that the variable names here reflect the references on the OSGI configuration from step 1 (such as “EMAIL_USERNAME“).
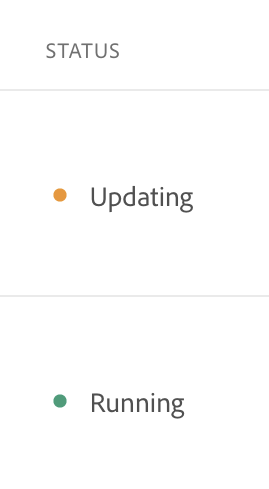
Please note: adding or changing environment variables will cause your instances to go into an “Updating” state for a couple of minutes. There is no downtime or service disruption but the updated variables will only be active after the instances are back to the “Running” state:
Now the basic configuration is done and we need to ensure proper network communication in step 3.
Step 3: Setting up the infrastructure
AEM Cloud Service pods are running isolated with strict rules on possible connections and communications. Therefore we need to allow and route the communication between the AEM environments and the e-mail server.
The following steps have to be done:
- Activate “Advanced Networking” for your environments.
- Setup port forwarding
- Optional: enable a dedicated egress IP address if you need to add the AEM CS environment(s) to the allow list of your e-mail server
All these settings are managed through the Cloud Manager API and do require some basic pre-work, e. g. to be able to retrieve an authentication (Bearer) token.
Preparing your client
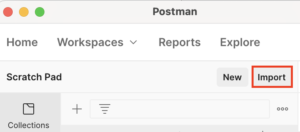
There are various tools available that allow you to call an HTTP API. If you are more of a CLI person, you might want to go the hard way using cURL. People preferring a graphical user interface might want to look at tools like Postman – like I do for the following steps.
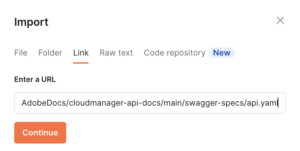
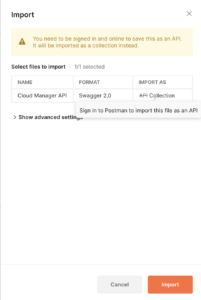
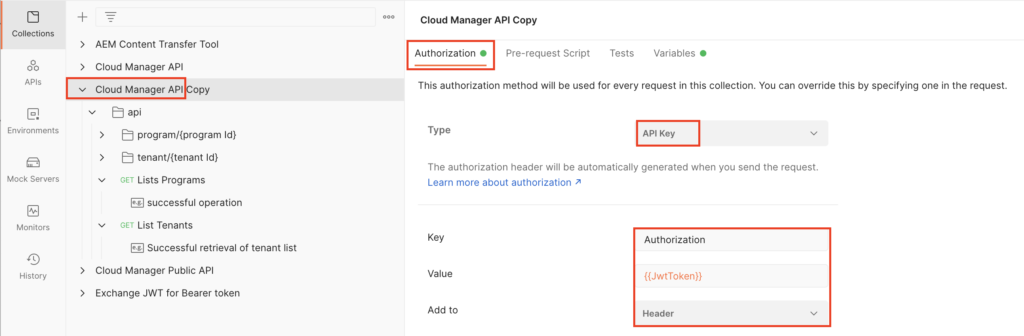
The Cloud Manager API links to a swagger API specifications file that can be imported to Postman (either as API if you are signed in or as a collection) and will give you a quick and easy way to work with the API.
Once the import is finished, select to root node of your new collection and configure the “Authorization” settings:
Setting up Adobe Developer Console with Cloud Manager API
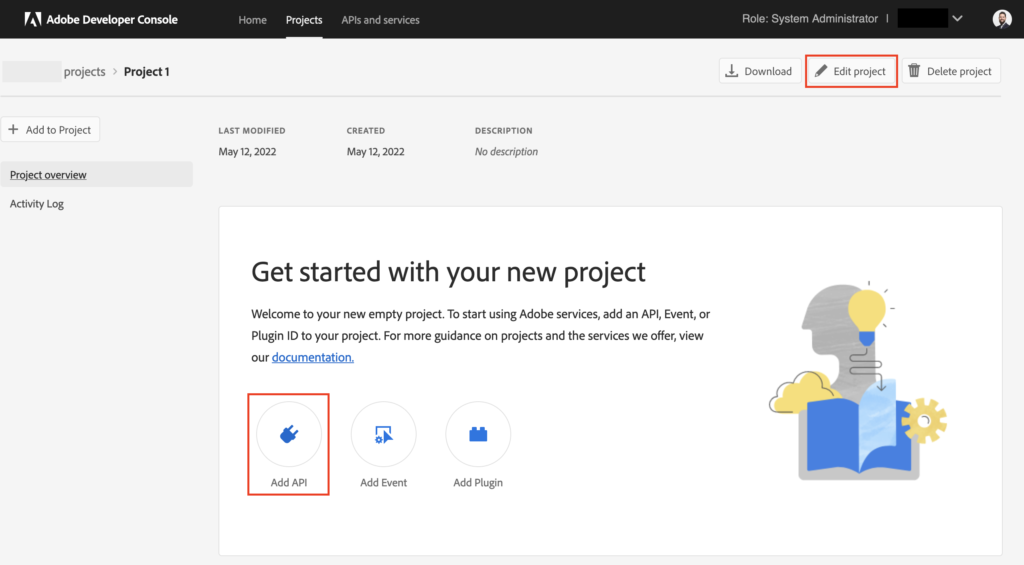
Before we can use the API from Postman, we need to setup the integration and authentication in the Adobe Developer Console. Select “Projects” from the top navigation and hit the “New Project” button. On the next screen, you can click the “Edit Project” button to provide a proper naming and description for your project, such as “AEM Cloud Manager”. Afterwards, add an API to your newly created project:
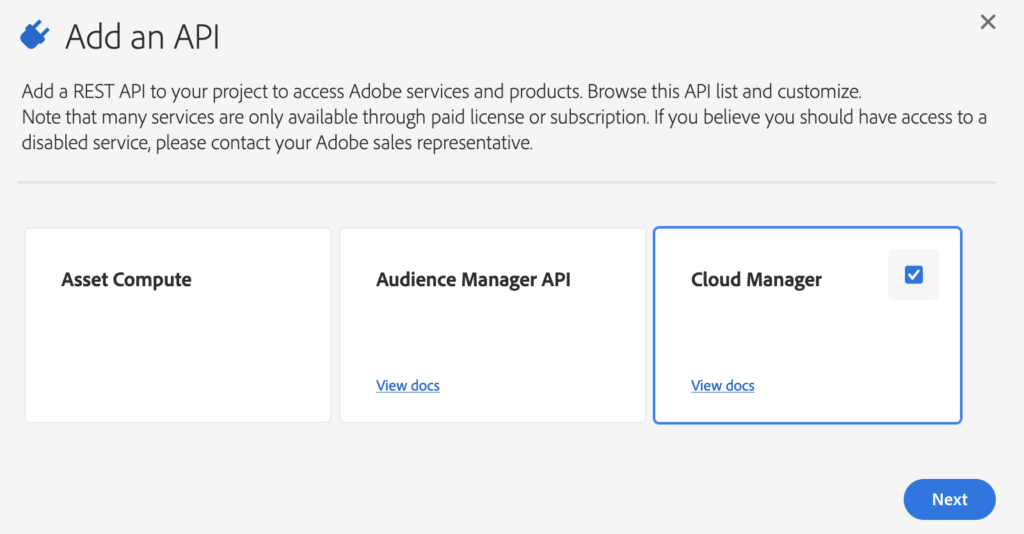
From the list, select the Cloud Manager API and click “Next”. Please note: If the Cloud Manager API is not in the list, you are most probably missing the required permissions/roles to perform this task. Talk to your organizations administrator.
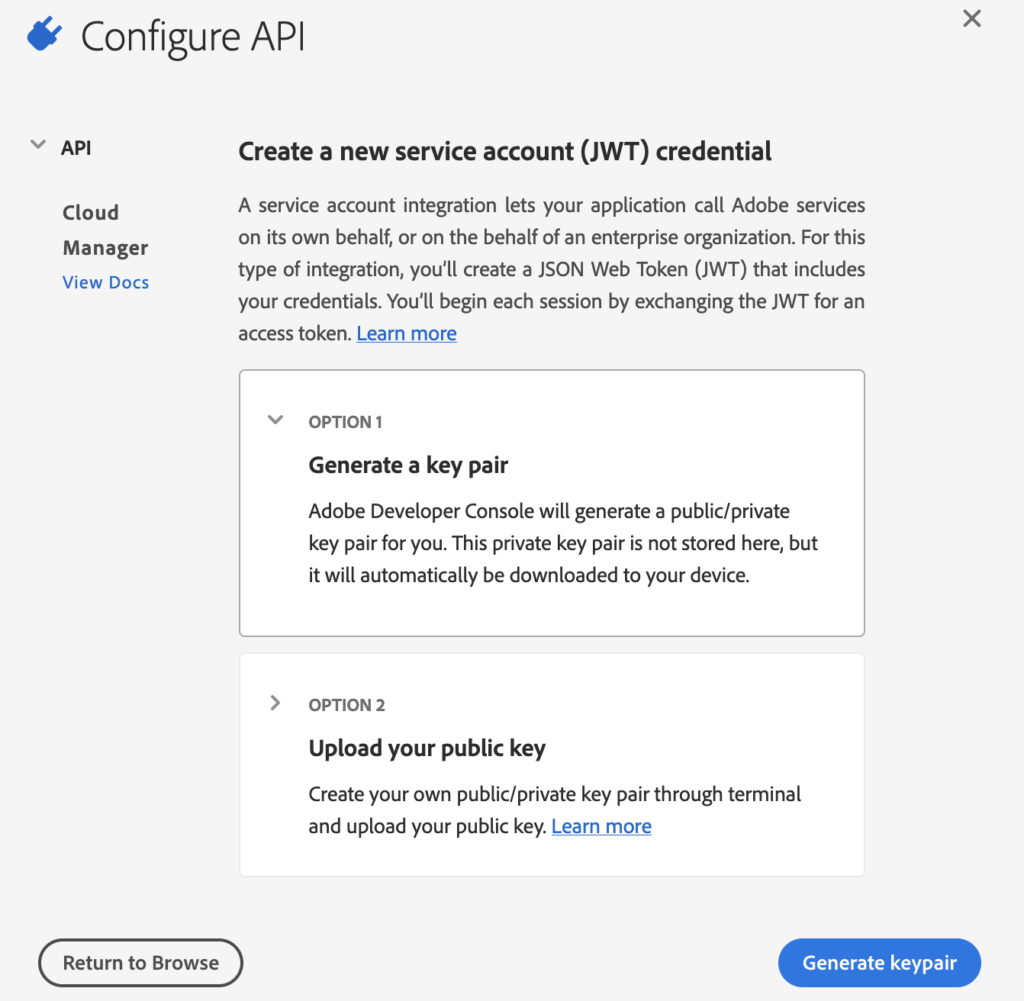
In the next step you will create JWT service account credentials to access the Cloud Manager API. You can either upload a keypair or have the system generate a new pair for you. If you opt for key generation, the generated key pair will be automatically downloaded to your system. Please store it securely and keep it handy for later use.
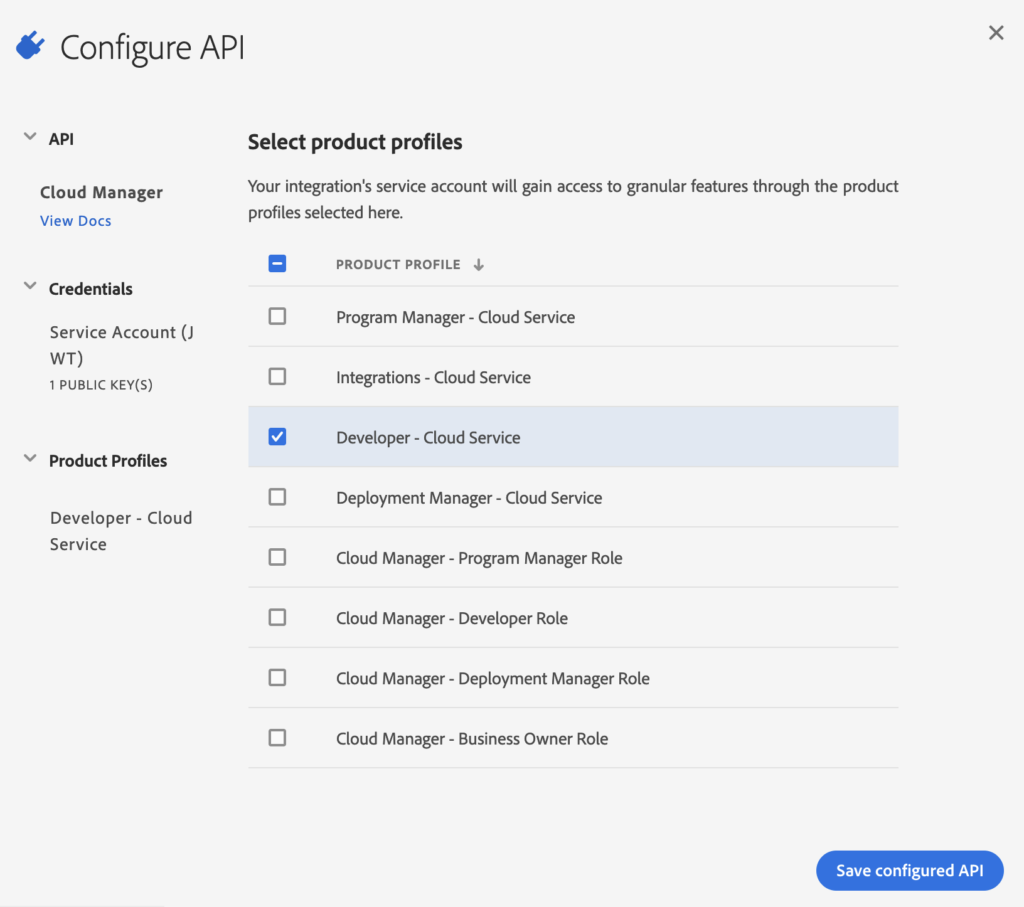
In the next step the required product profiles need to be assigned to the service account. Please note: Unfortunately, I couldn’t find a definite answer on which profile is required. Also, the product profiles available to you may differ and be restricted based on the role you have for your organization. I’d recommend to go with either “Developer” or “Deployment Manager”.
Now, you’re almost set. On the project overview page, go to “Cloud Manager” under APIS. Here you will find the information that’s required to call the Cloud Manager API:
- IMS Client ID
- IMS Org ID (ending with “@AdobeOrg”) and
- JWT access token (needs to be generated).
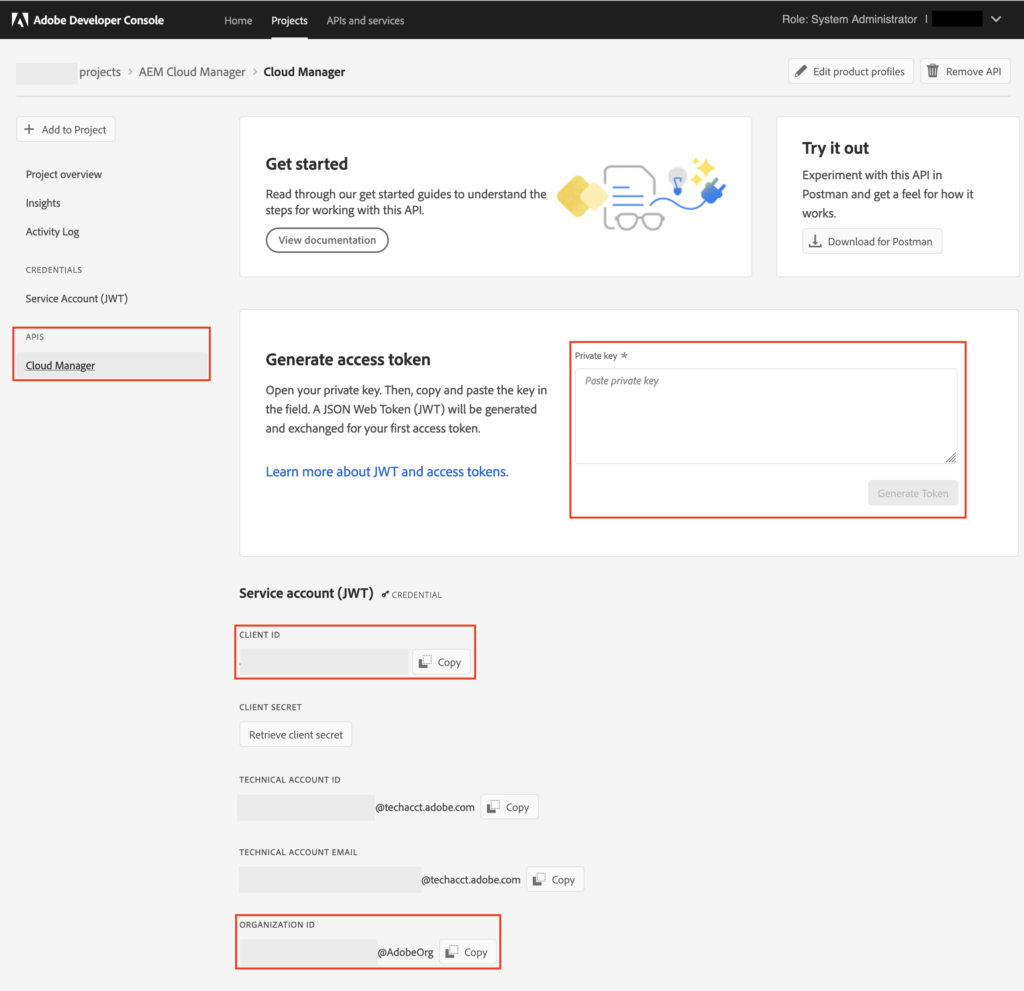
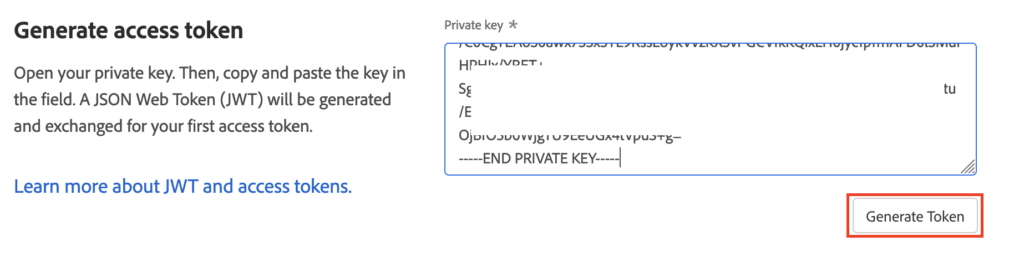
For the JWT access token, paste the private key from the key pair generated in the previous step into the text area and click “Generate Token”.
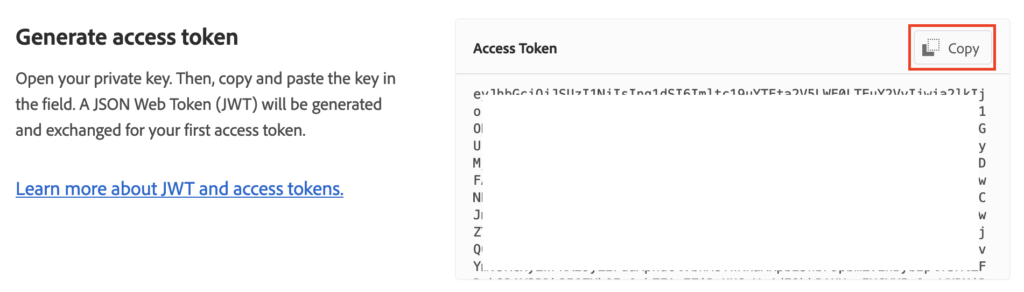
Copy and store the generated token along with your Client ID and Org ID for later use.
Please note: JWT access tokens will expire on a regular basis and need to be regenerated with your private key.
Calling Cloud Manager API
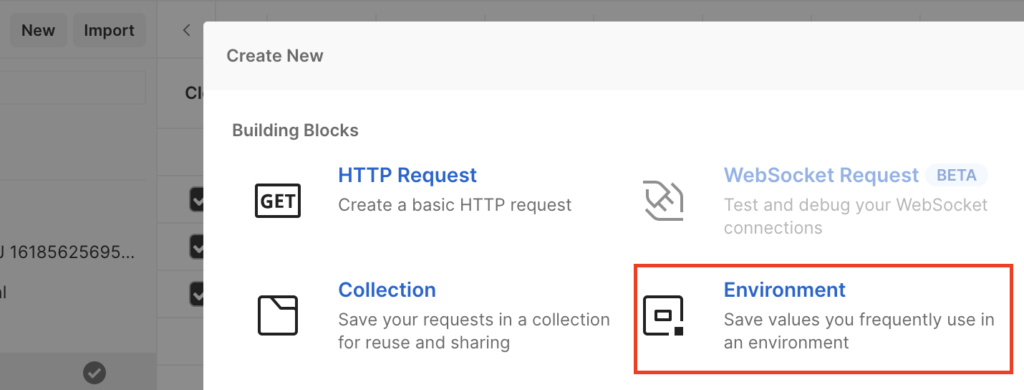
Back to Postman, create a new Environment: Click “New” and select “Environment”, provide a label (e. g. “Cloud Manager API” and add three variables:
- JwtToken
- ImsOrgId
- ImsClientId
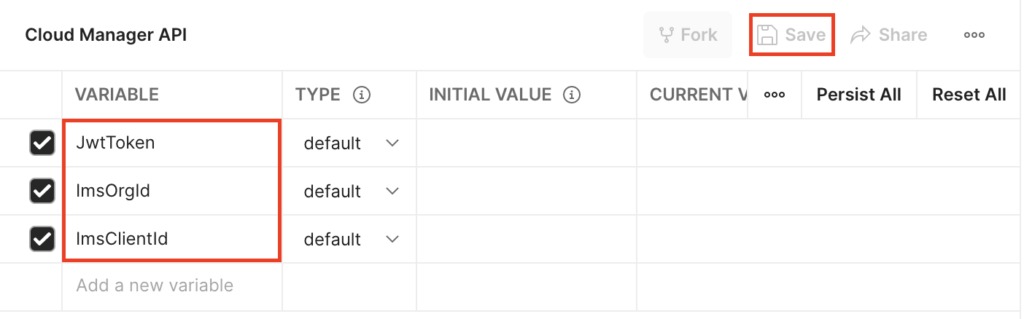
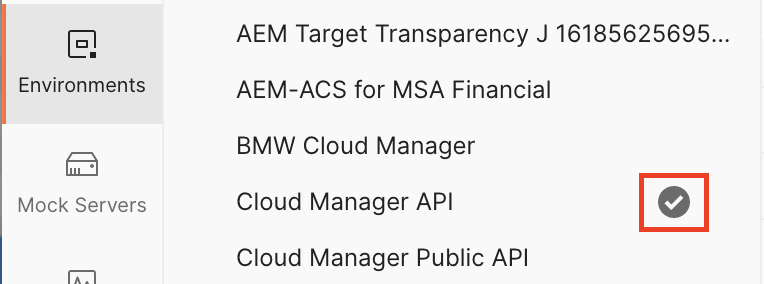
Enter the values retrieved in the last step from the Adobe Developer Console as “Initial Values” for your variables and hit “Save”. Make sure to activate your environment, indicated by the check mark after the environment name:
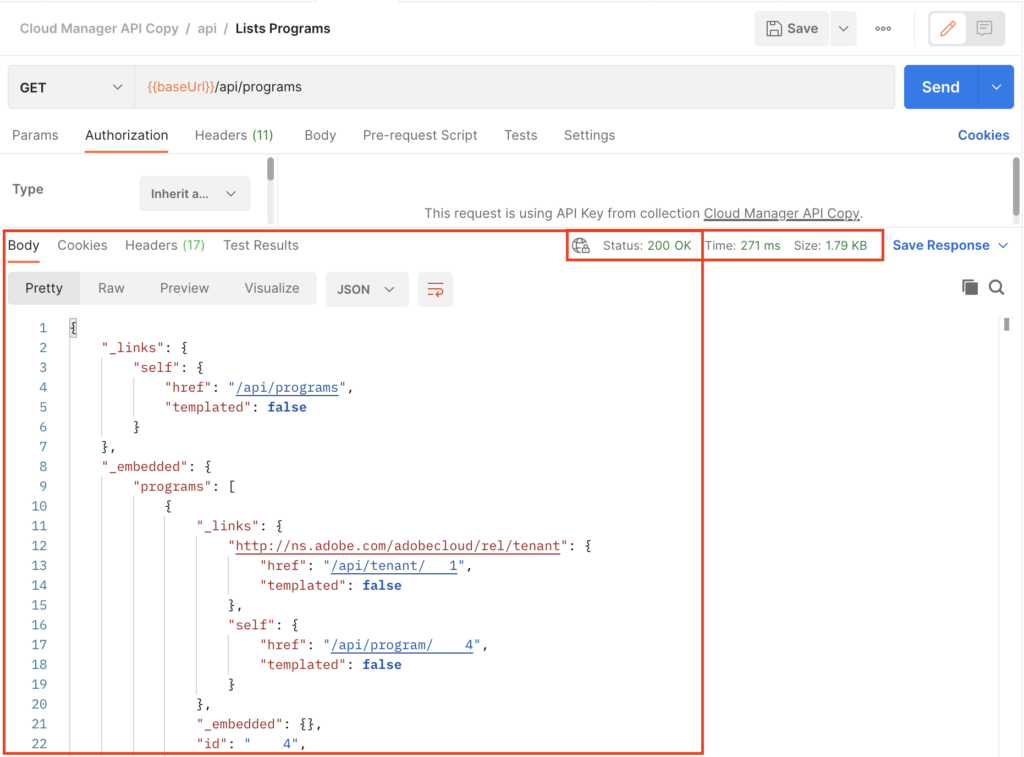
Now, go back to your API or Collection and select one of the more “basic” actions, like “List Programs”. On the “Headers” tab, we need to add the Org ID and the Client ID to the according header keys by referencing the variables from our environment. Variables are enclosed by double curly brackets and Postman has an autocomplete feature once you have typed the two opening curly brackets. Also make sure that under the “Authorization” tab, you are referring back to the configuration from the root node that has been created earlier by selecting “Inherit auth from parent”.

Preparations finished!
Hit “Send” to see if everything works as expected. You should get an HTTP 200 OK response with some information about your program in JSON format:
Infrastructure configuration
The Cloud Manager API has now been setup successfully and you are ready to go for the actual infrastructure configuration.
The next step is to enable advanced networking by either activating flexible port egress or dedicated egress IP as outlined in the documentation. To do so, simply send the desired option to the API endpoint Create network configuration:
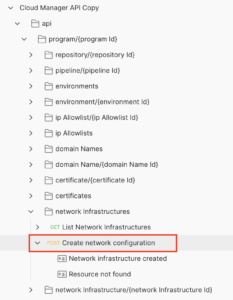
Before sending the request, make sure to fill the required parameter programId (can be retrieved from the test request to list programs) also set the headers for IMS Org ID and Client ID to your environment variables as outlined in the last step. If you receive an error message “Api Key is invalid” you have most likely missed to point the header to your environment variables.
As a payload, you need to specify the “kind” of the network config and a region. You can go for flexiblePortEgress or dedicatedEgressIp. The later is required if you need to add the IP address of AEM CS to the allow list of your e-mail server (or any other connected system), otherwise you may probably want to go with the flexible option to avoid funneling traffic through the egress proxy.
{
    "kind": "dedicatedEgressIp",
    "region": "va6"
}
Please note that it may take a couple of minutes until the network config is active after you send the request. Once the network config has been activated for your program, you need to enable Advanced Networking for each environment with another API call:
{
"portForwards":
[
        {
            "name": "smtp.example.com",
            "portDest": 443,
            "portOrig": 30710
        }
    ]
}
Again: check that all required parameters (programId, environmentId) are set and your headers point to your environment variables.
When everything is setup and active, there is one optional step if you need to add AEM CS to an allow list of your e-mail or any other system. To retrieve the IP address that is being used for egress, you can use tools like dig on your command line:
$ dig +short p{programId}.external.adobeaemcloud.comThis will return the dedicated egress IP address of your AEM CS setup.
That’s it! Let’s test…
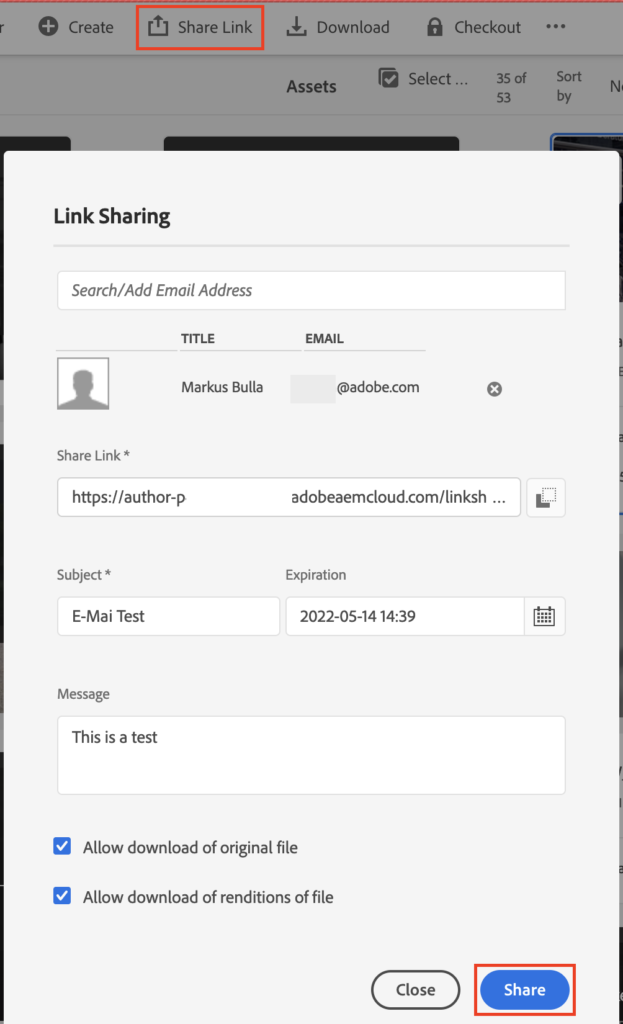
You’re done! Now you can login to AEM and test e-mail sending. The easiest way is probably to share an asset with yourself. Navigate to “Assets” and “Files” and select any asset or folder. Then click “Share Link”:
If something does not work as expected, you’ll get an according workflow in your inbox with an error message:

In this case, you’ll need to double check on the configuration and maybe activate e-mail debugging on the OSGI configuration (see step 1). Afterwards, check the log files of the instance through Cloud Manager (similar to getting the OSGI configs as outlined at the end of step 1).
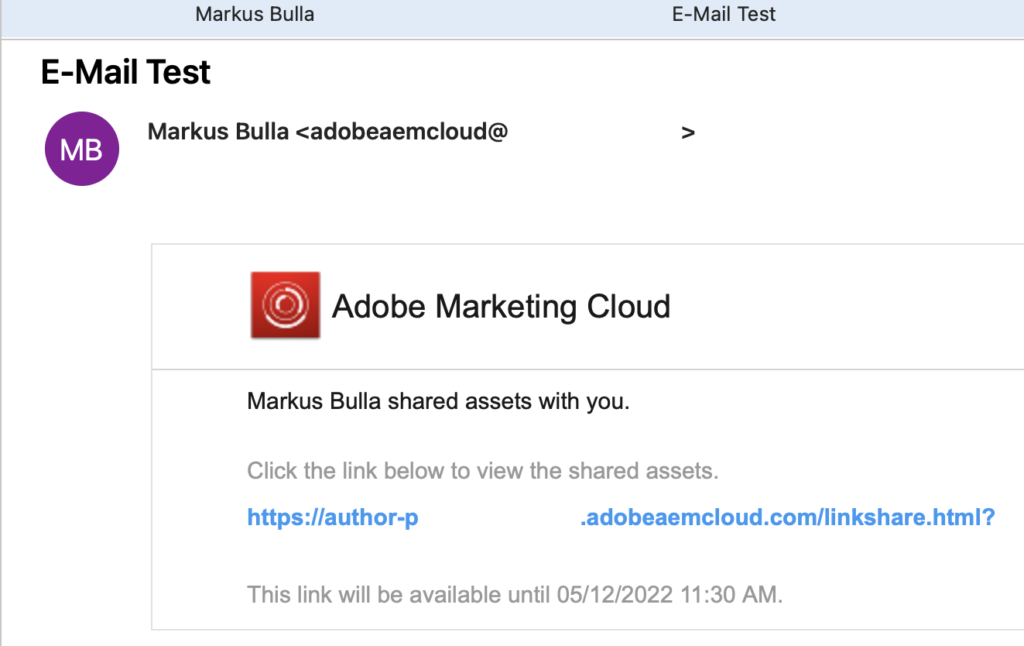
If everything does work as expected, you’ll simply see the e-mail notification arriving in your e-mail inbox:
Happy e-mailing!